You can create custom fields to store additional information about contacts in your Zaetoon Helpdesk, such as customer reference numbers, account roles, or other details relevant to your business.
Create a Custom Field Group
From your Helpdesk, go to Settings → Contacts → Contact Custom Fields.
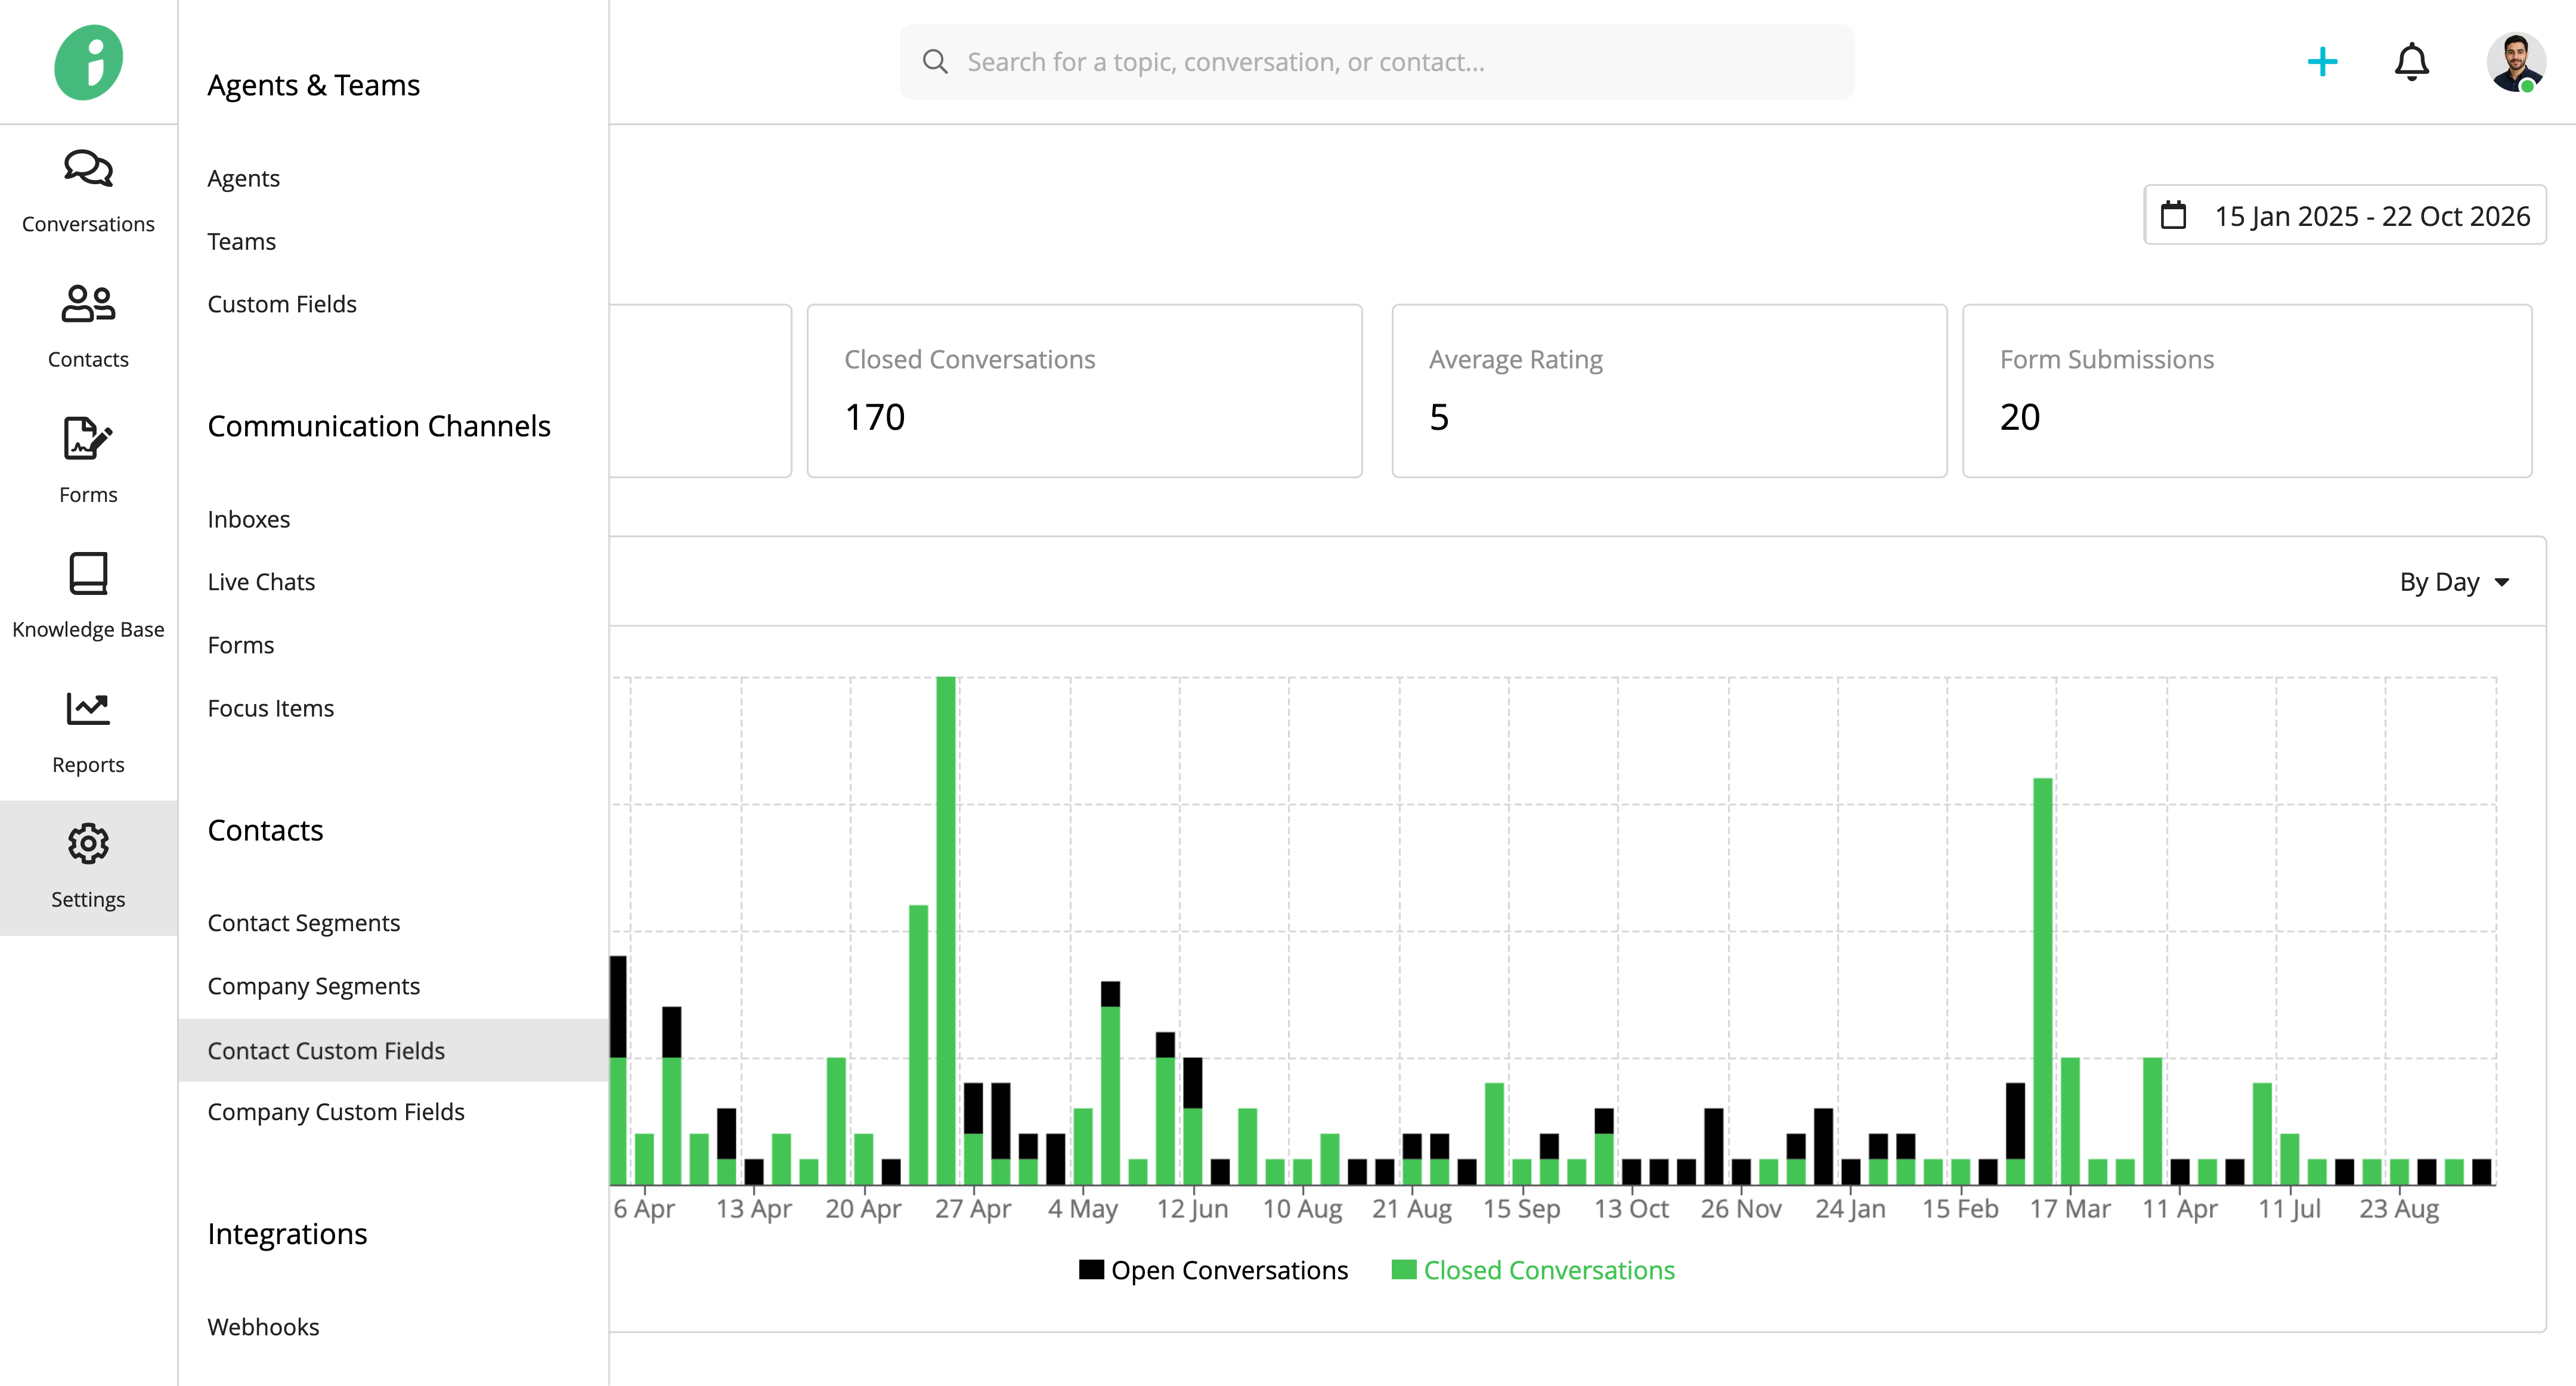
Click + Field Group in the top-right corner.
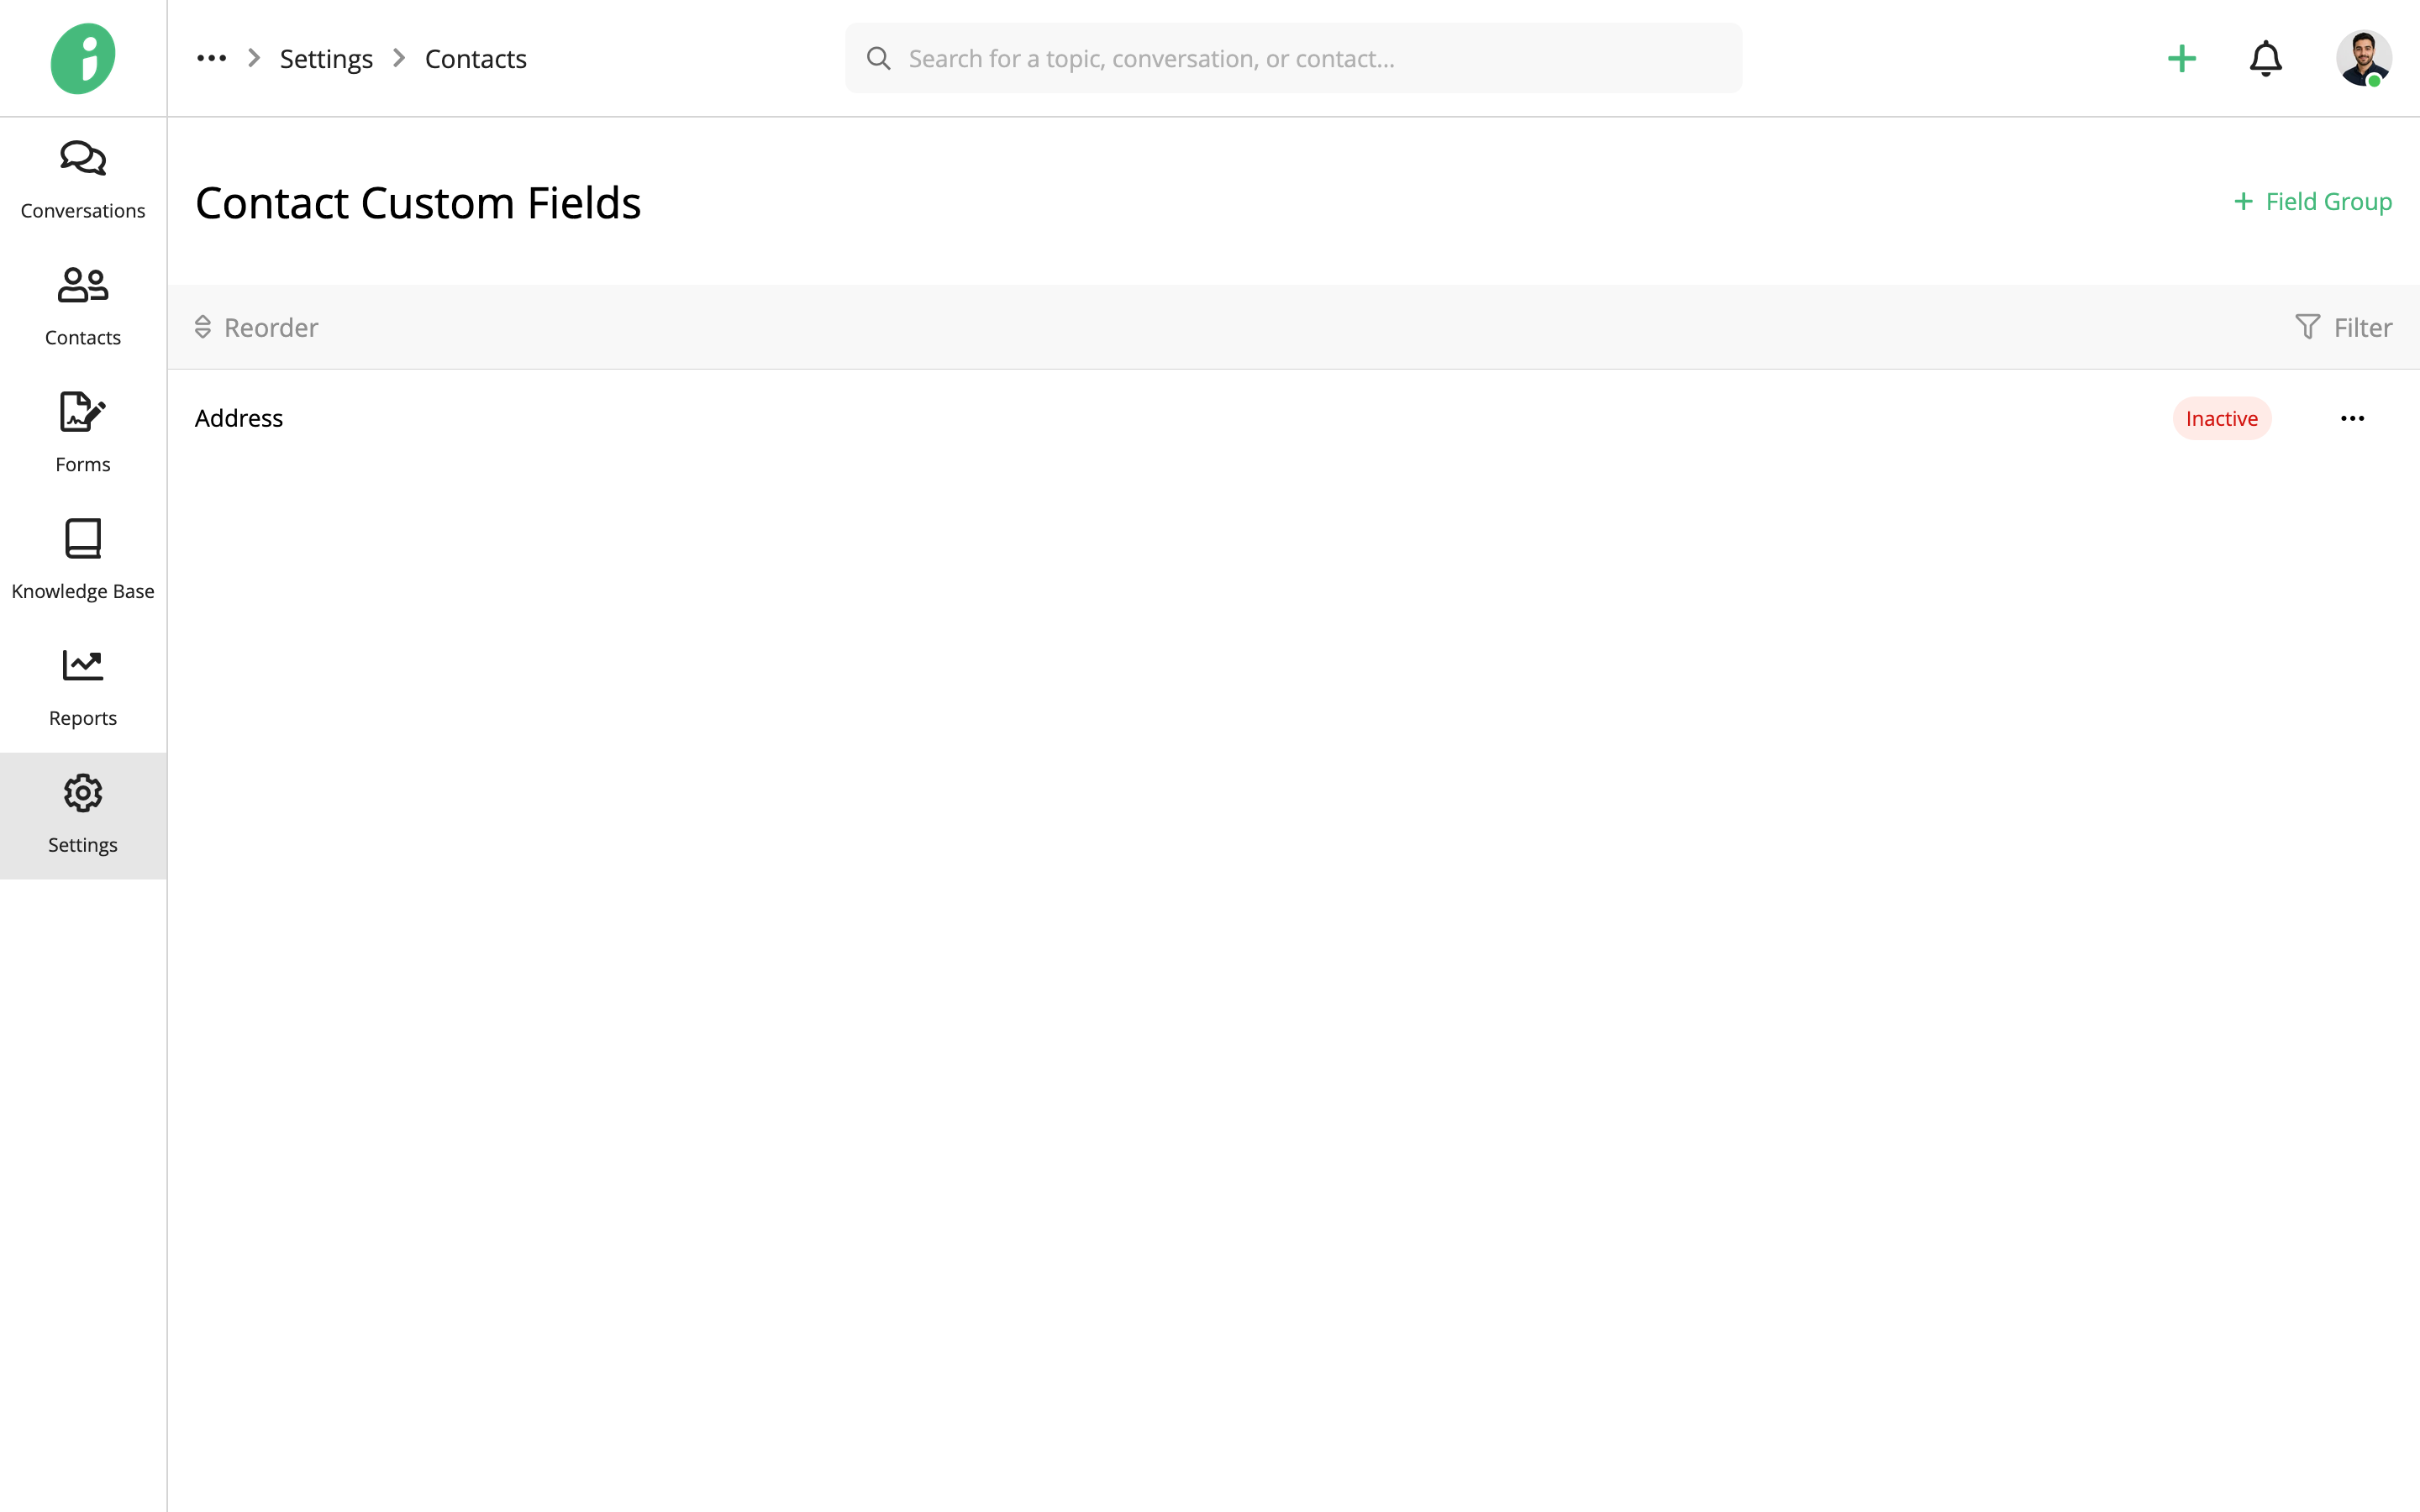
Basic Settings
Under Basic Settings, configure the following:
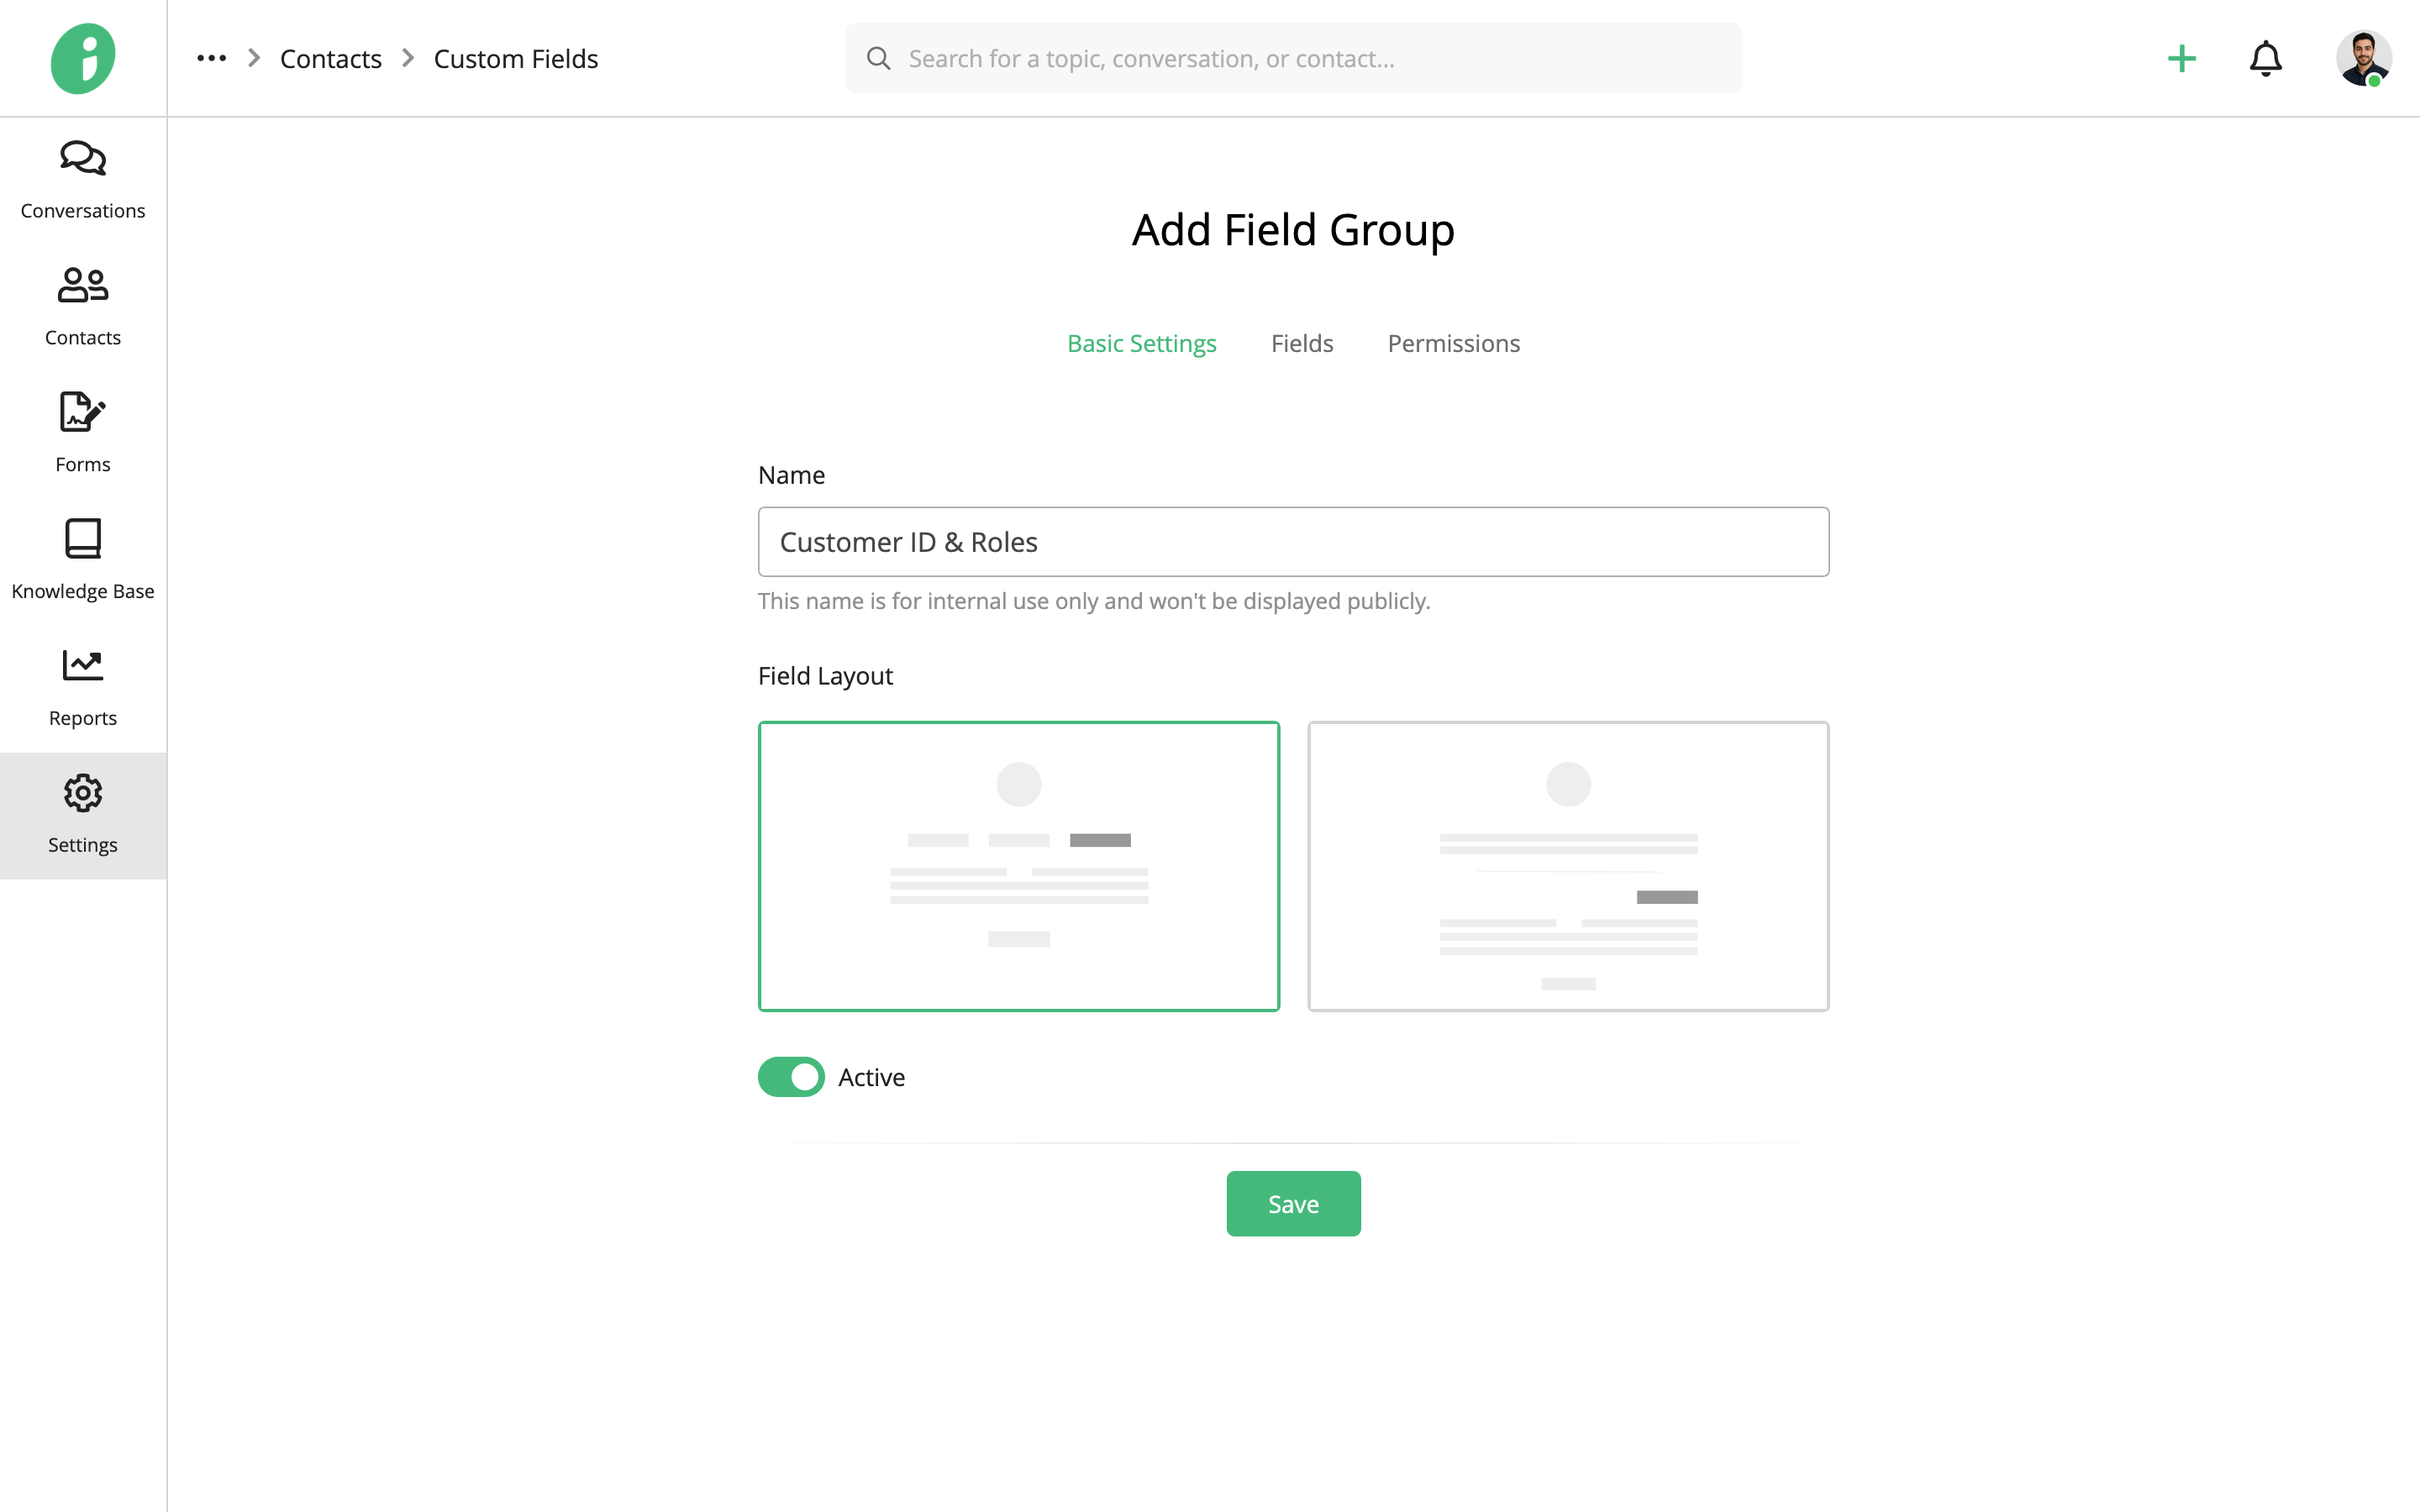
- Name: Enter a name for the field group, such as Customer ID & Roles. This name is for internal use only and won’t be displayed publicly.
- Field Layout: Choose how the field group appears on a contact’s profile.
- Active: Enable or disable the field group.
Add Custom Fields
Select Fields and click + Add Field.
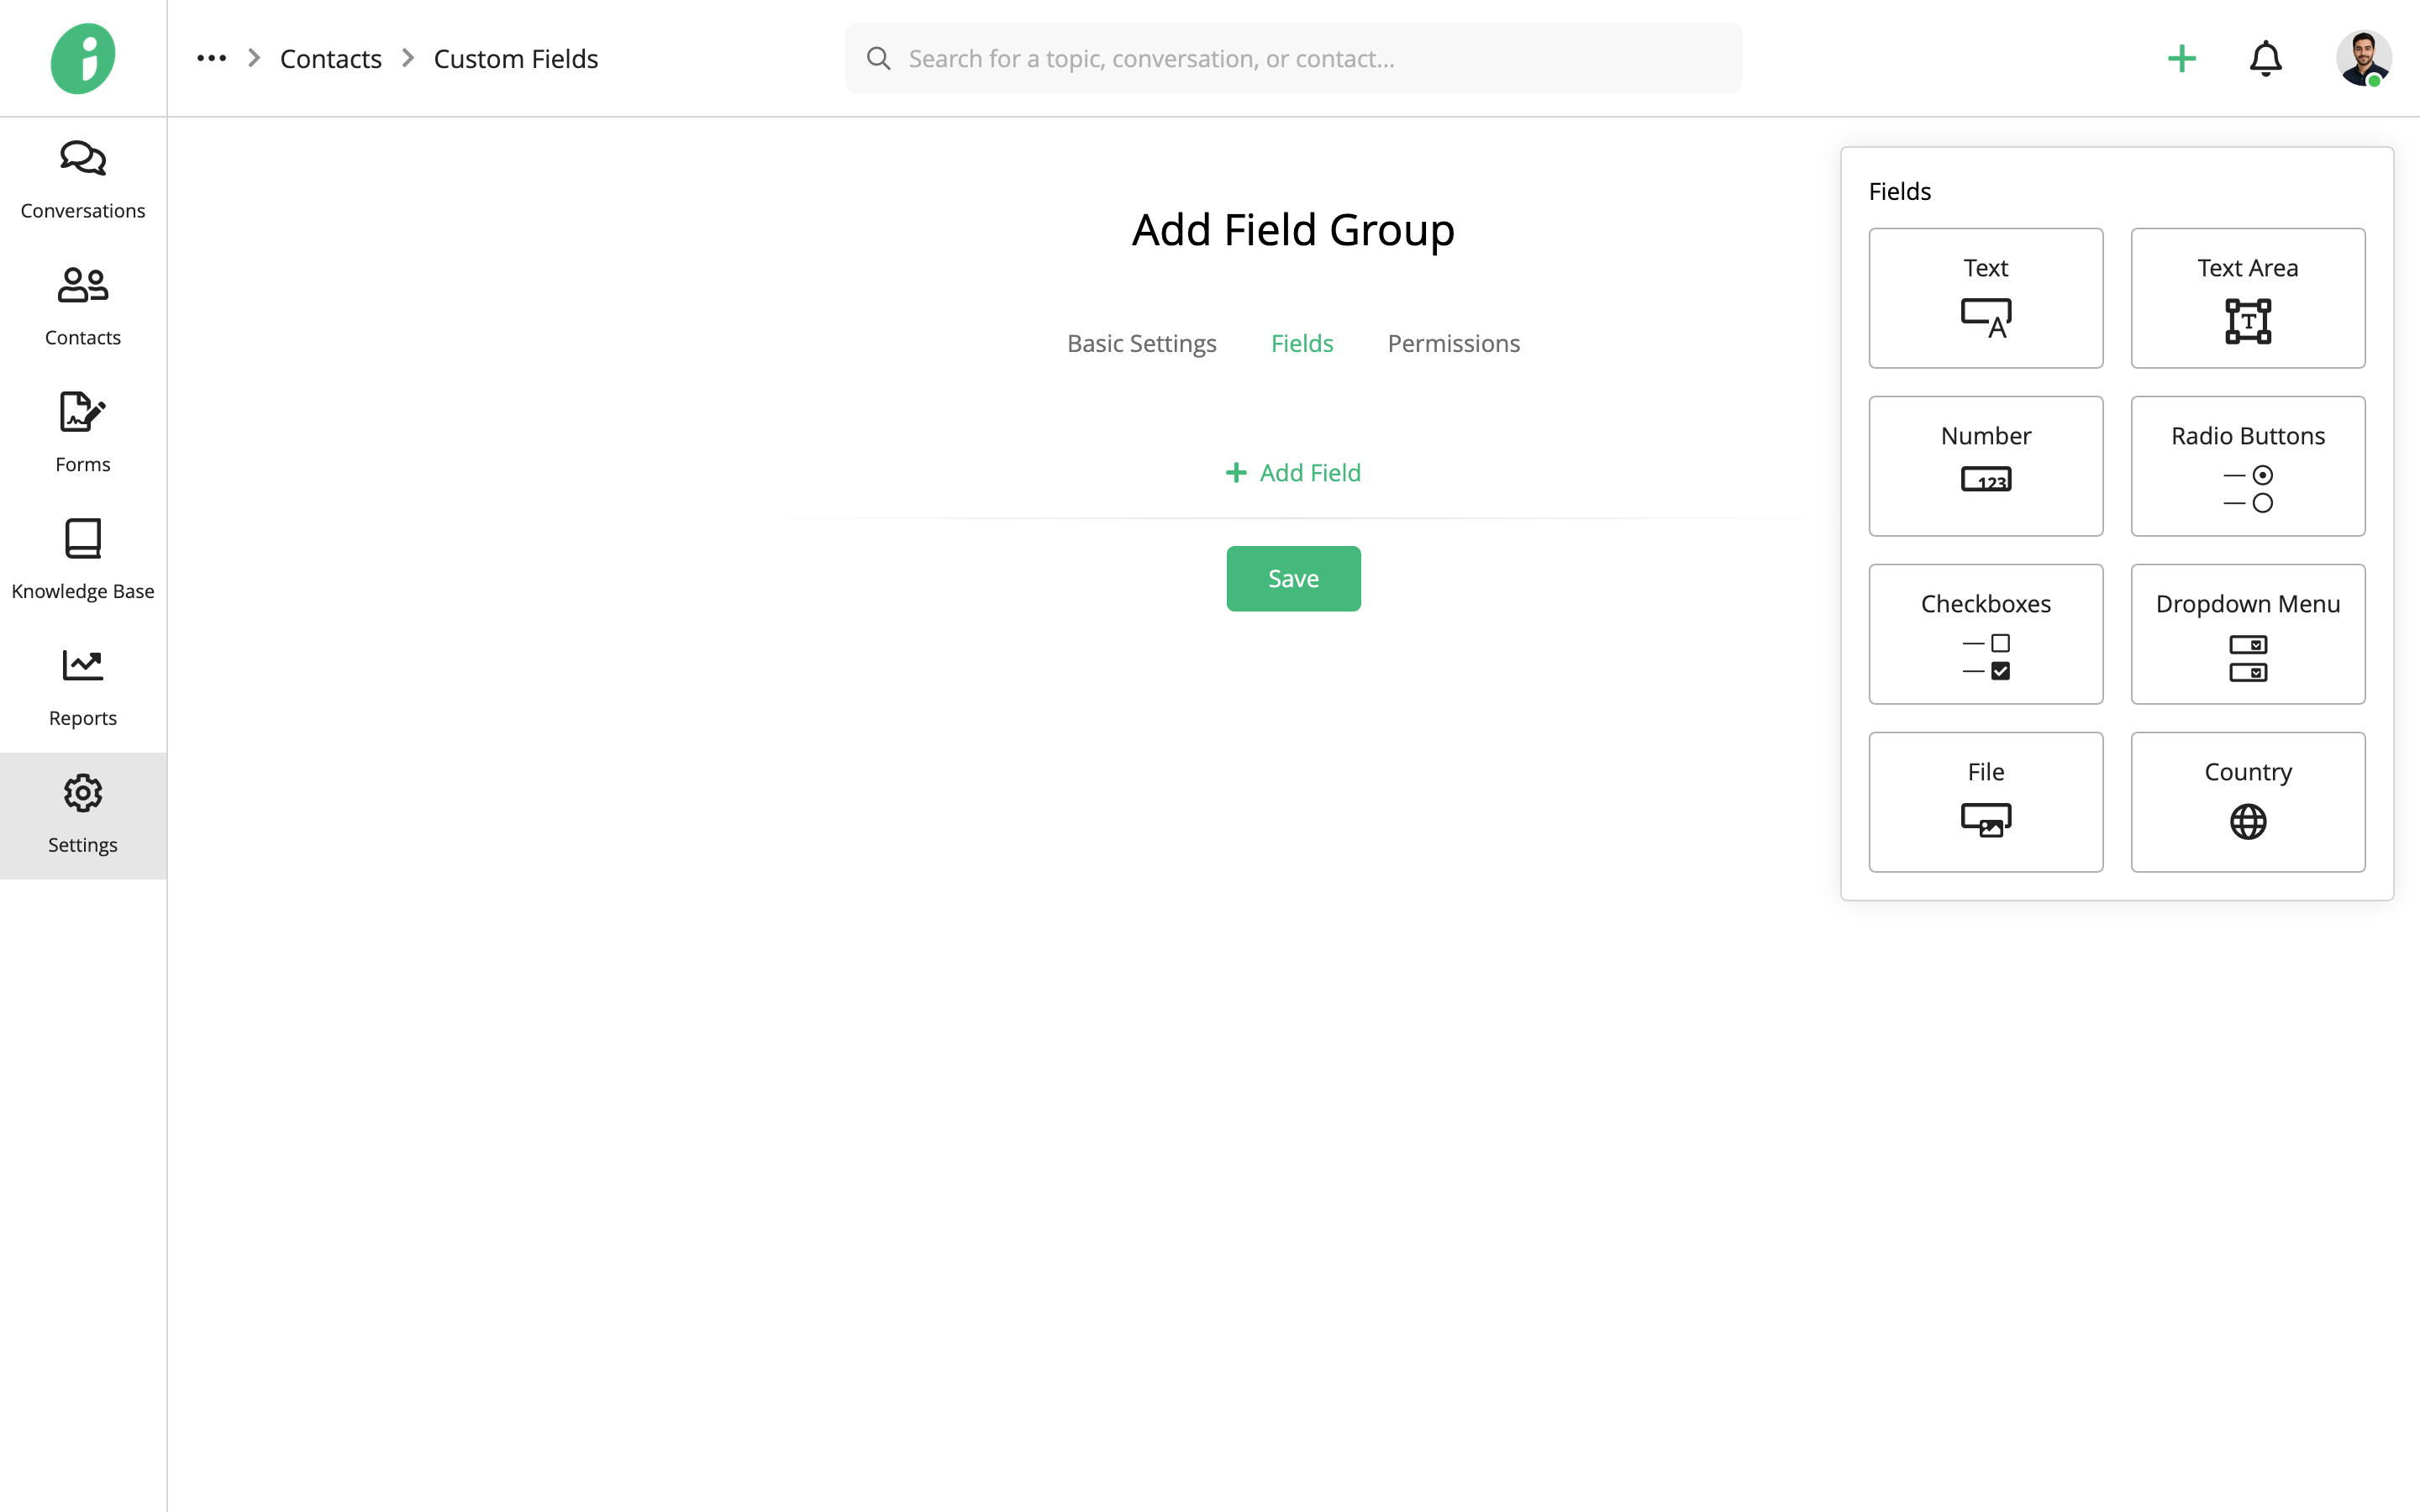
Choose the type of field you want to add:
- Text: A single-line text field.
- Text Area: A multi-line text field.
- Number: A field for numeric values.
- Radio Buttons: A set of options where one can be selected.
- Checkboxes: A set of options where multiple can be selected.
- Dropdown Menu: A list of selectable options.
- File: A field for uploading files.
- Country: A field for selecting a country.
For example, you can add a Text field for an External Customer ID and a Dropdown Menu for a Contact Role.
Configure Field Settings
Select the field you added to open its Field Settings.
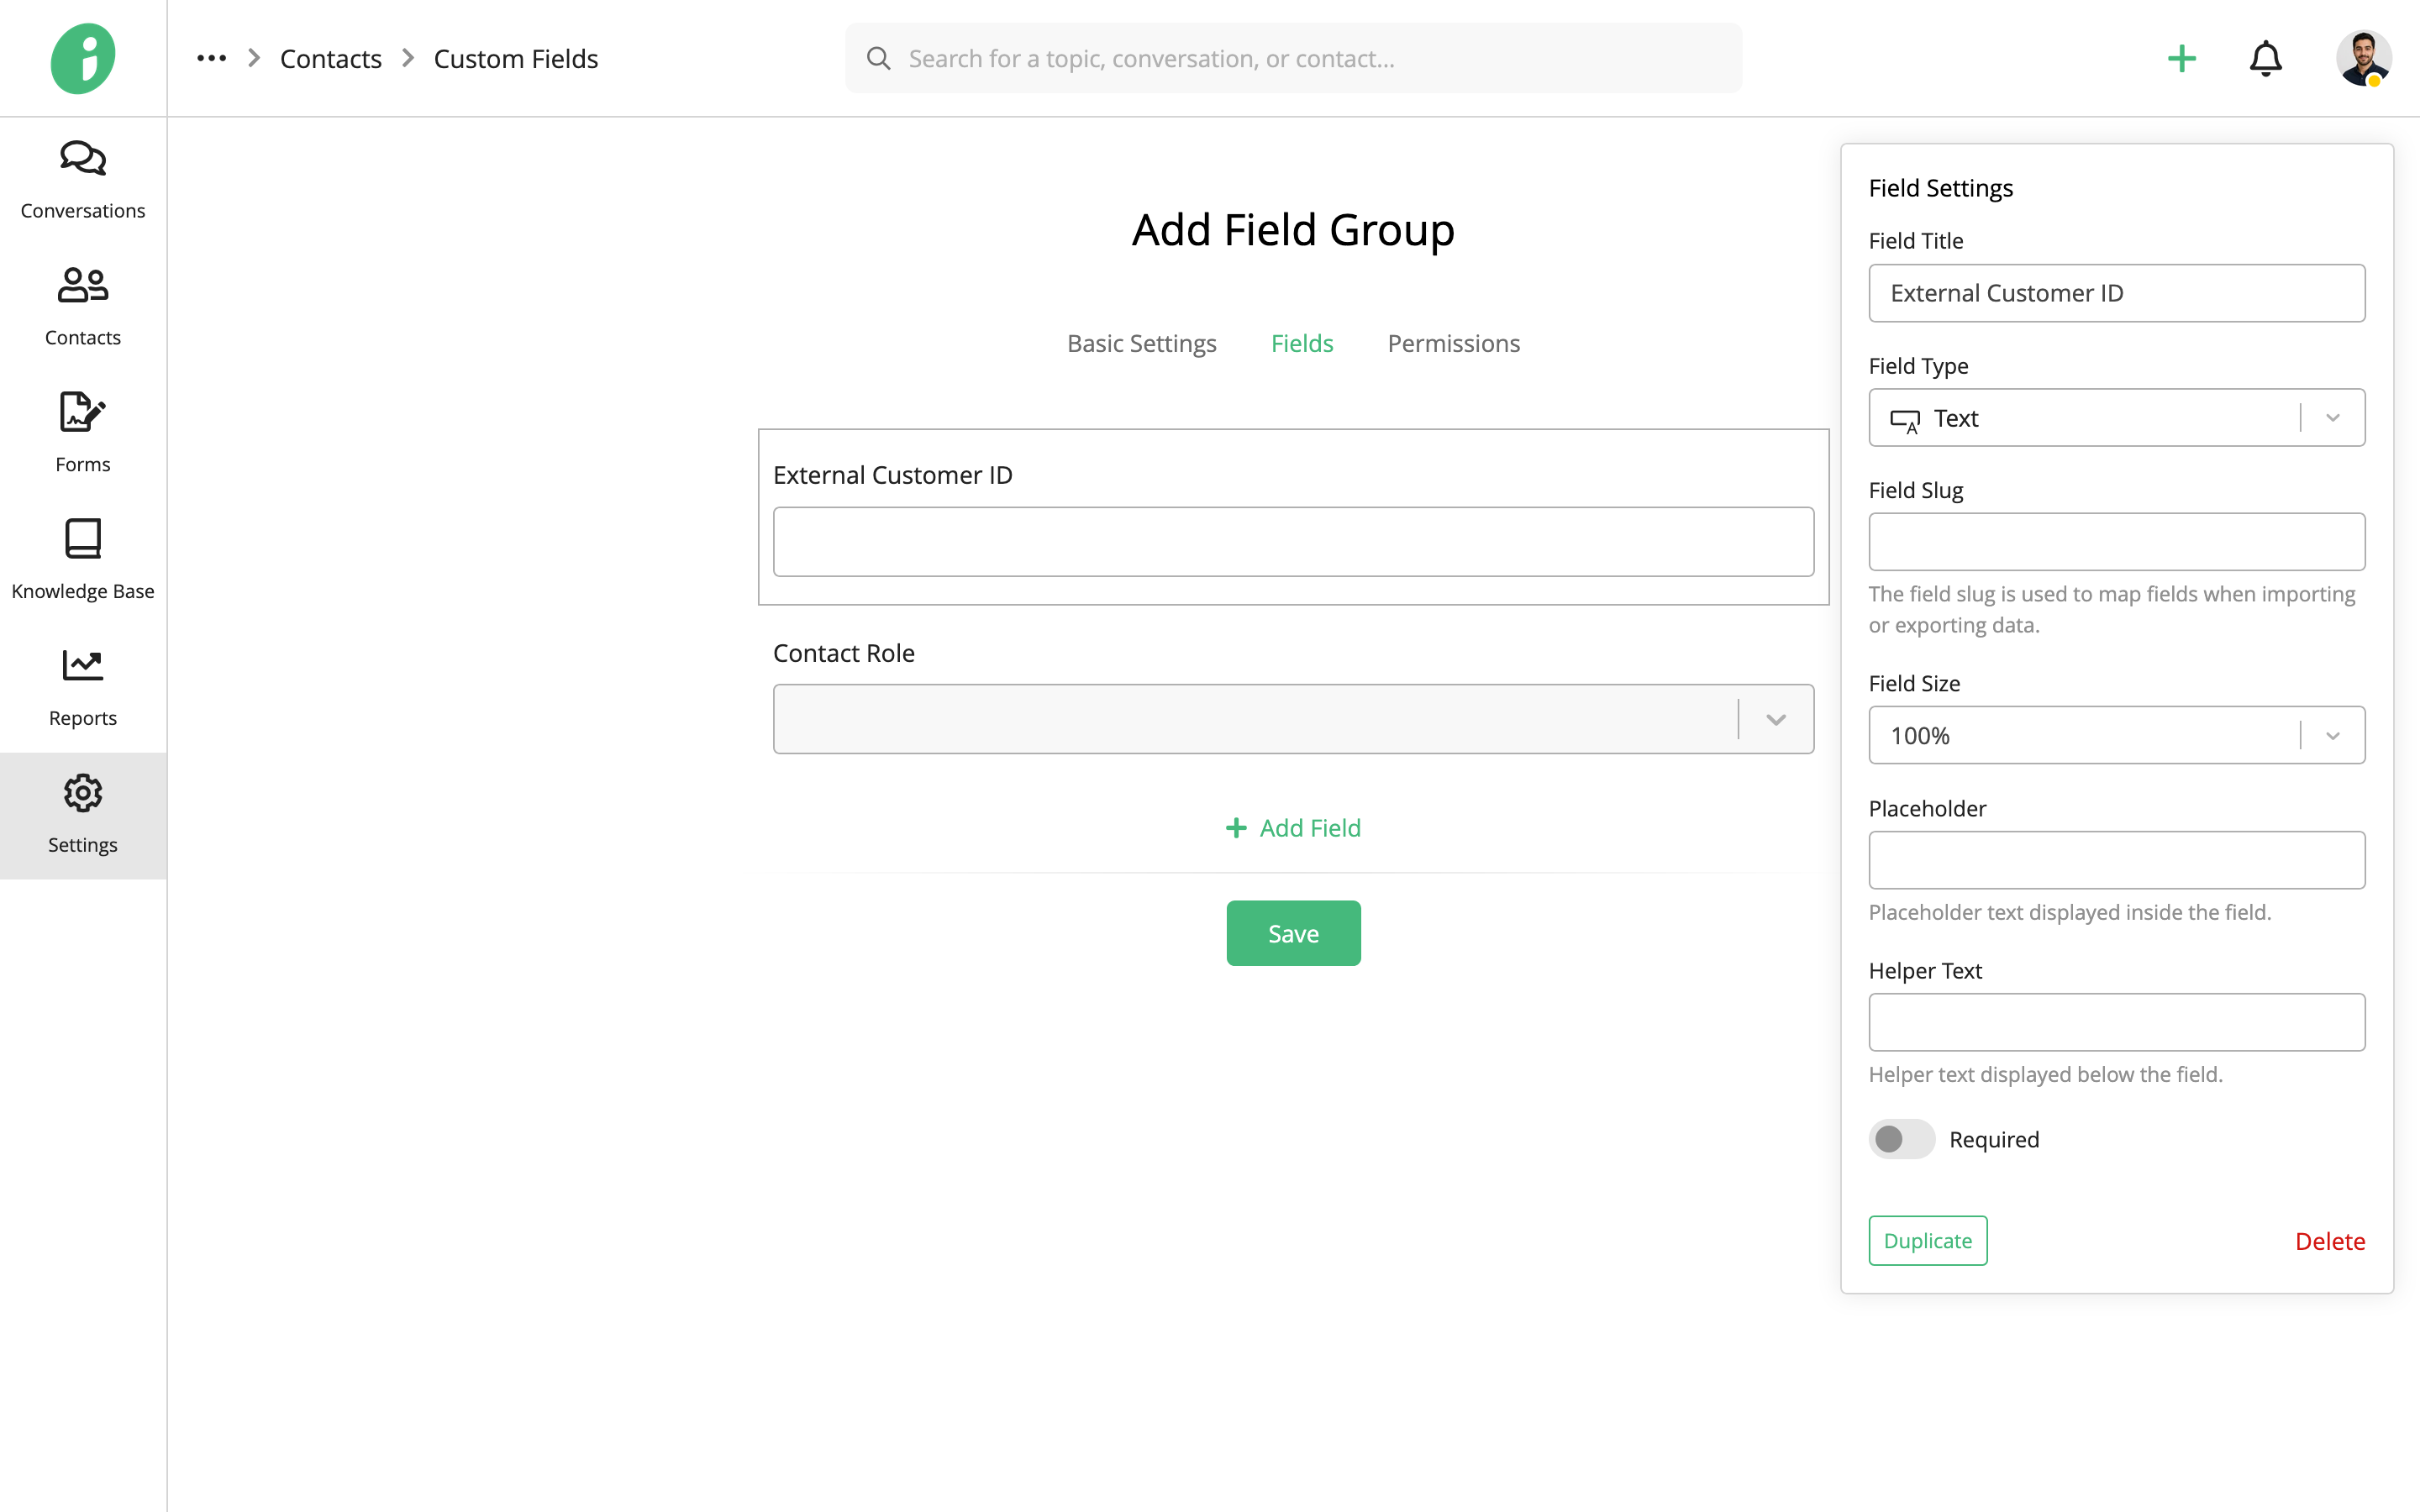
Configure the following:
- Field Title: Enter the name displayed for the field.
- Field Type: Select the type of information the field collects.
- Field Slug: Enter an identifier used to map the field when importing or exporting data.
- Field Size: Choose how much space the field occupies.
- Placeholder: Enter text displayed inside the field before a value is entered.
- Helper Text: Add instructions displayed below the field.
- Required: Specify whether the field must be completed.
You can also use Duplicate to copy a field or Delete to remove it.
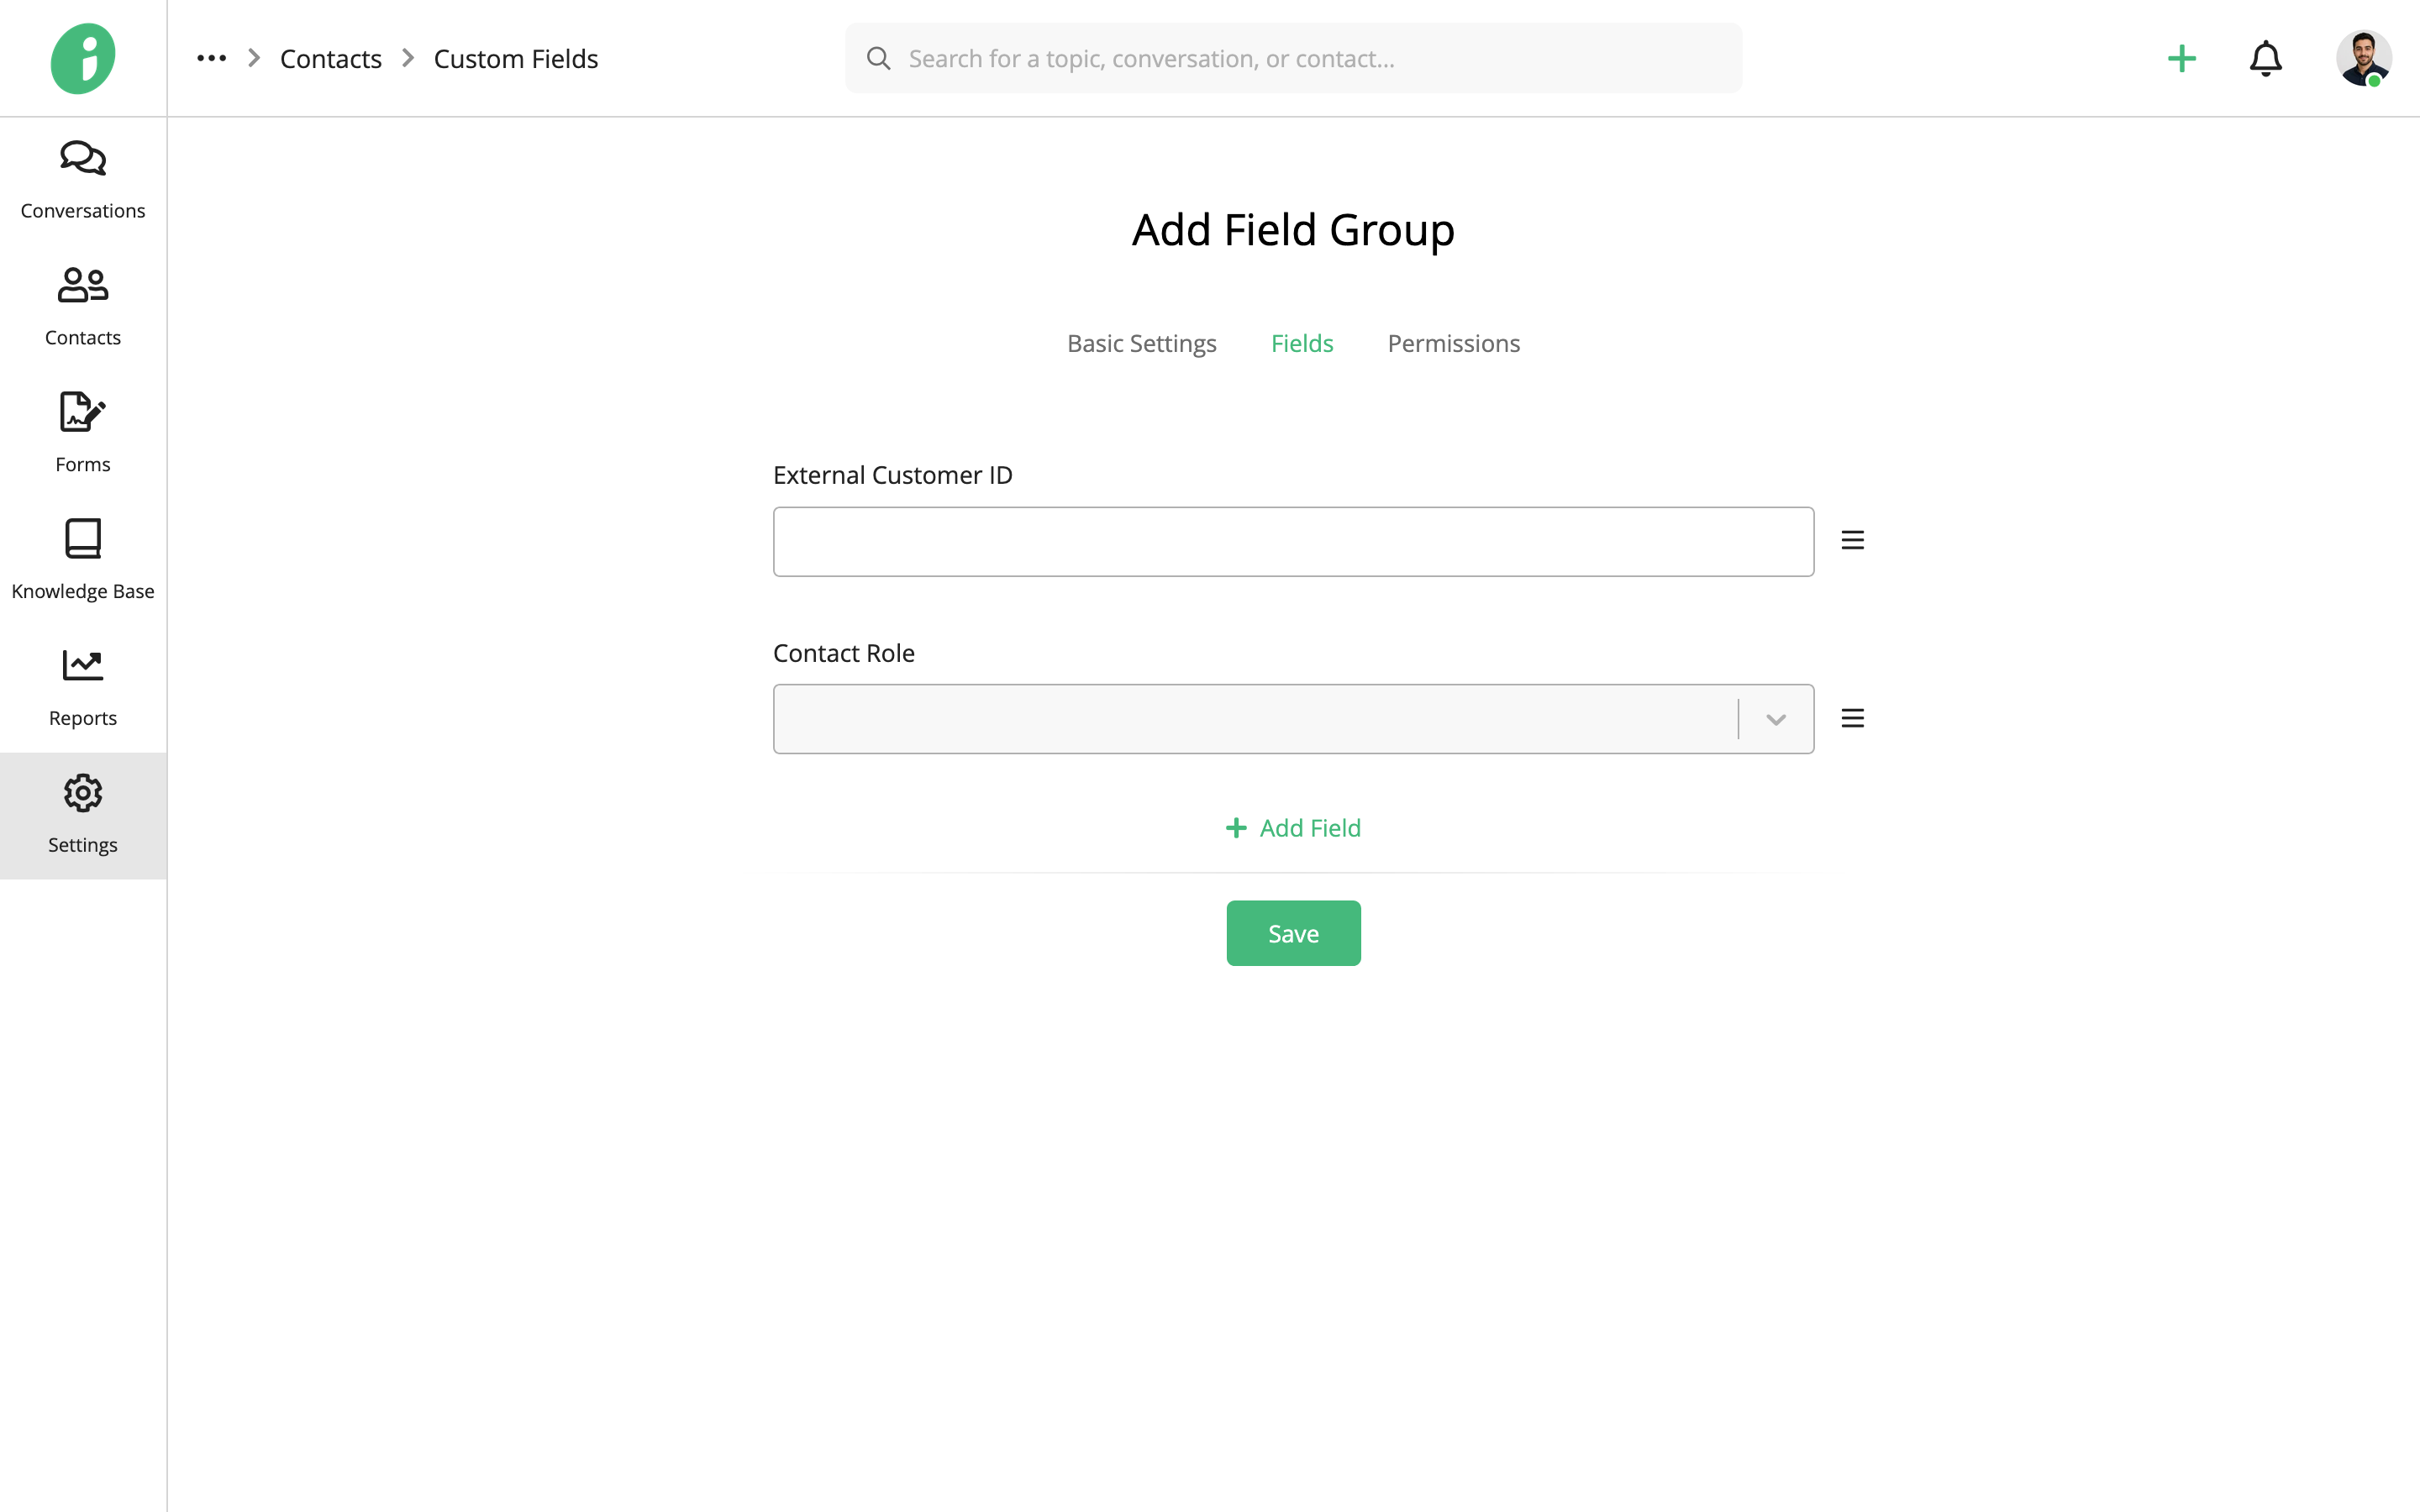
Rearrange Fields
Drag fields using the handle beside each field to change their order.
Permissions
Select Permissions to configure who can access the field group.
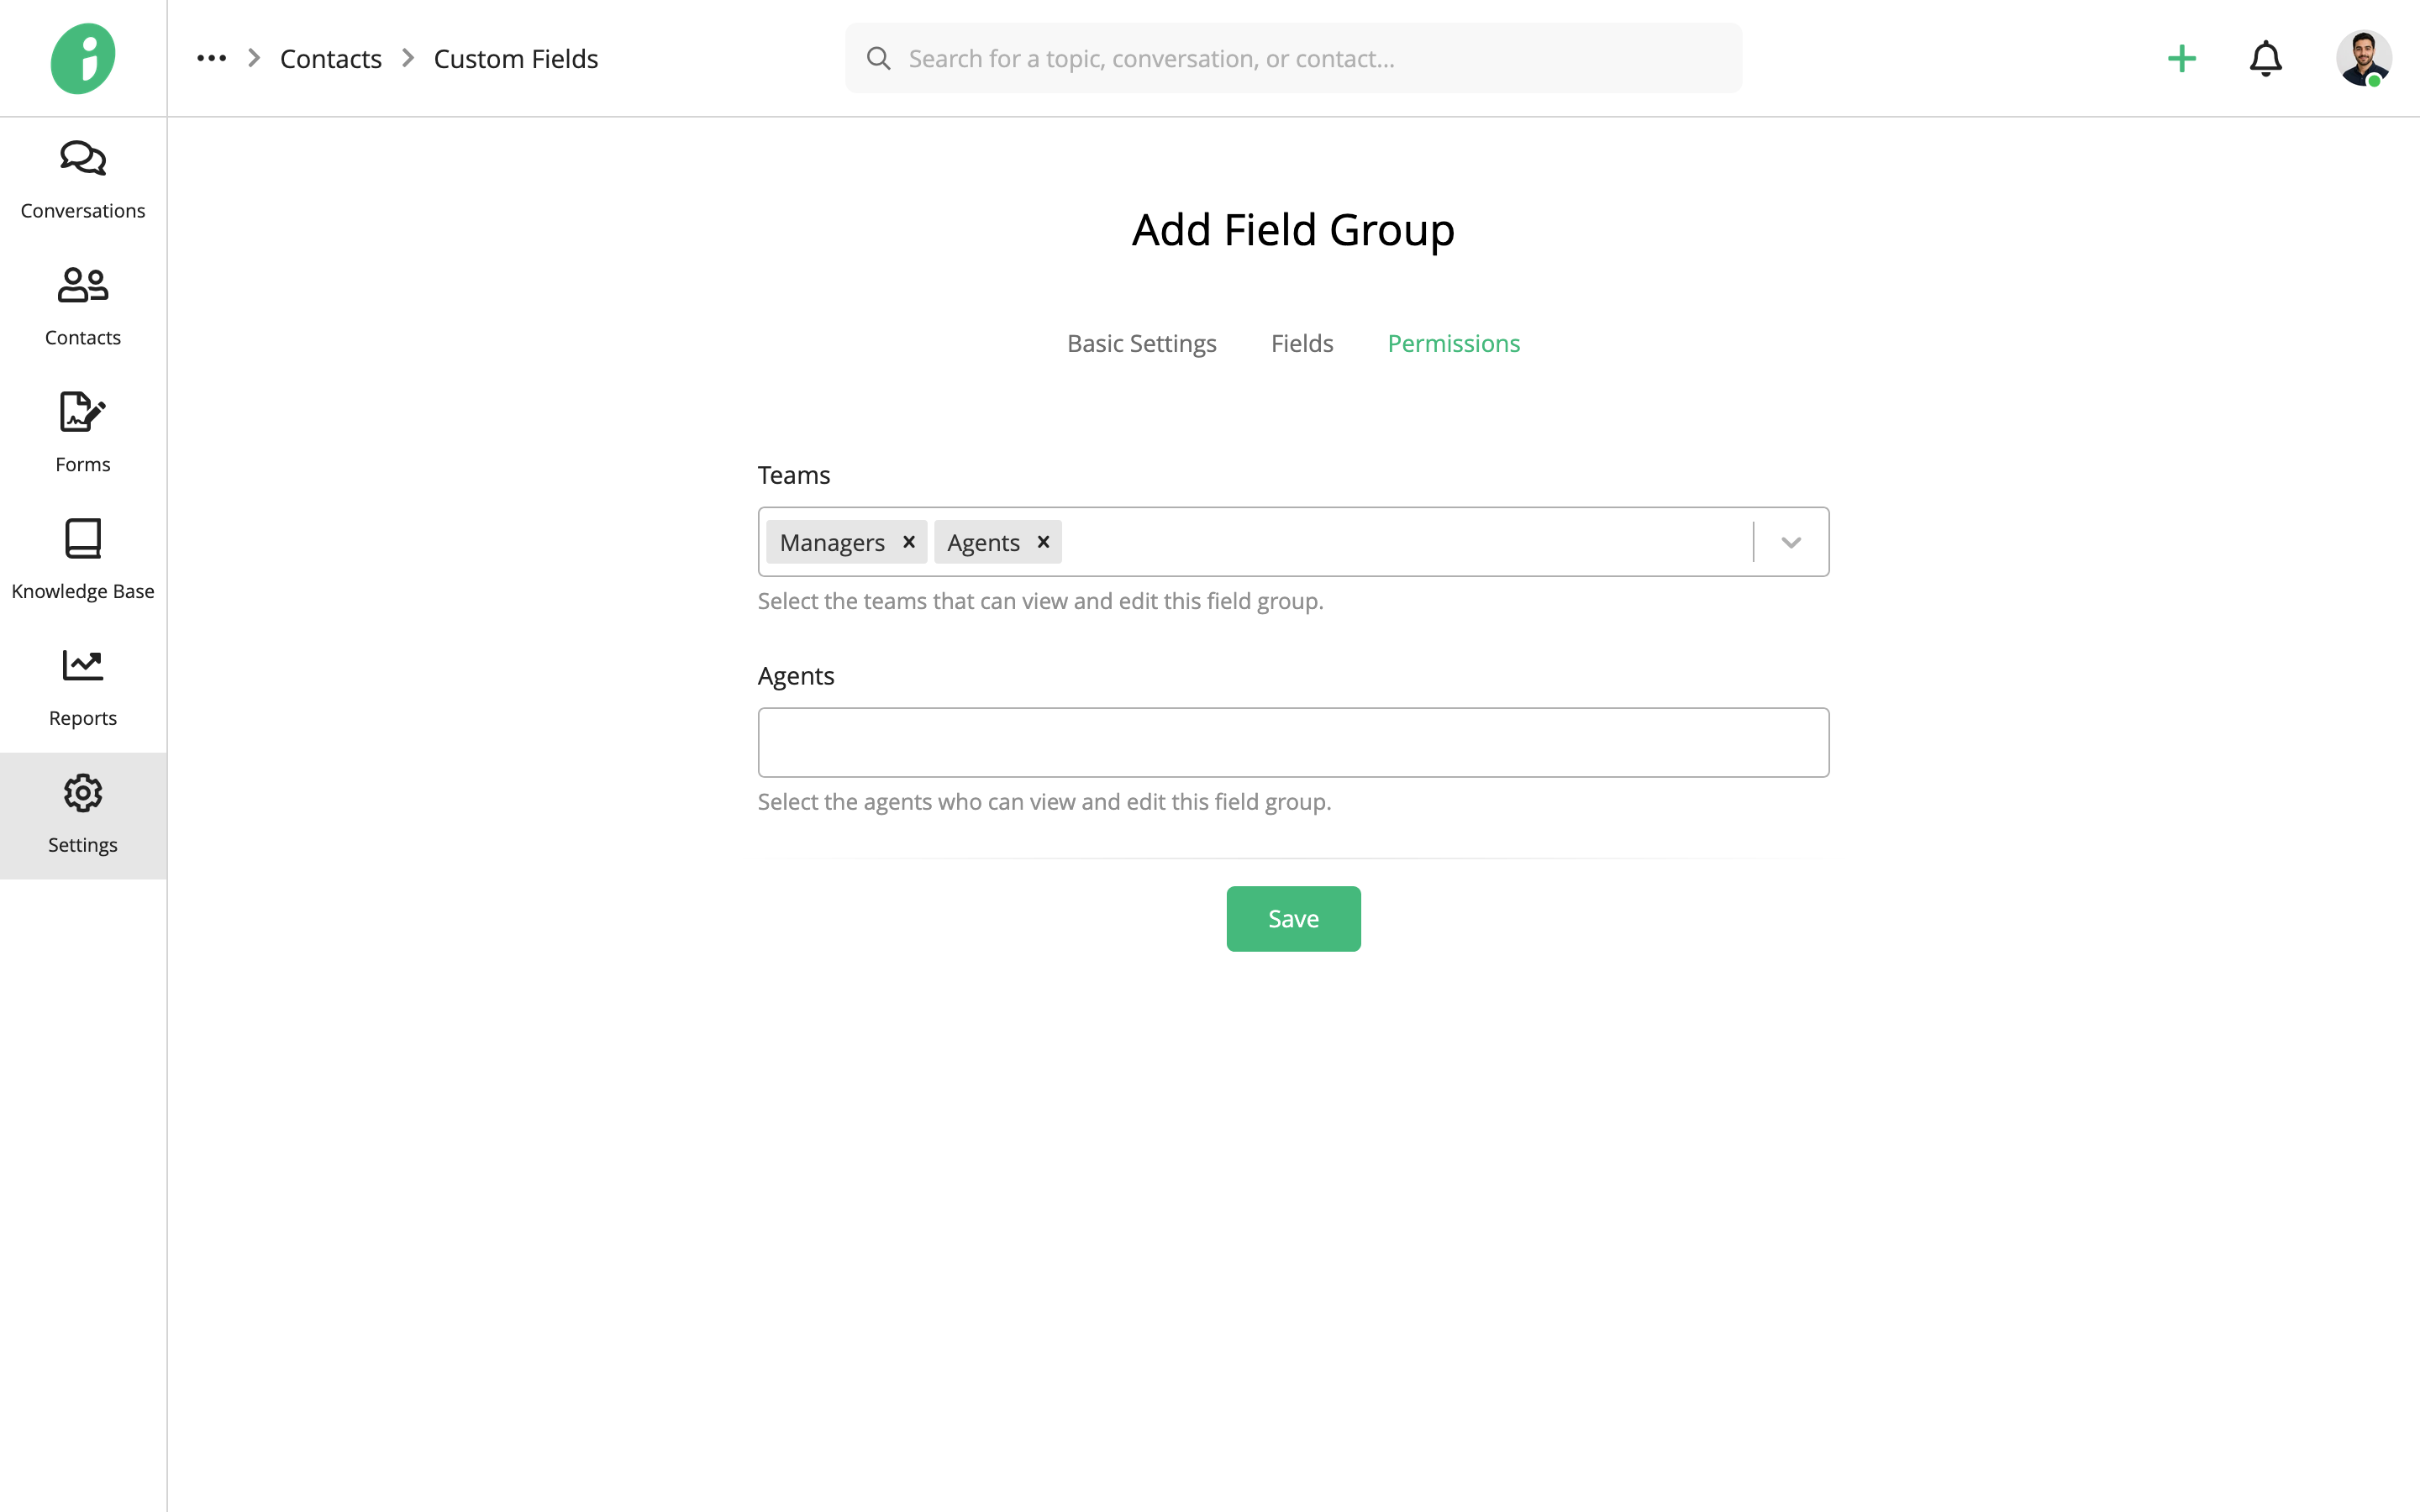
- Teams: Select the teams that can view and edit the field group.
- Agents: Select the agents who can view and edit the field group.
The contact custom fields will be visible to agents based on the permissions you configure.
Click Save to create the field group and apply your changes.
Enter Contact Custom Field Information
After creating a field group, you can enter information into its fields from a contact’s profile.
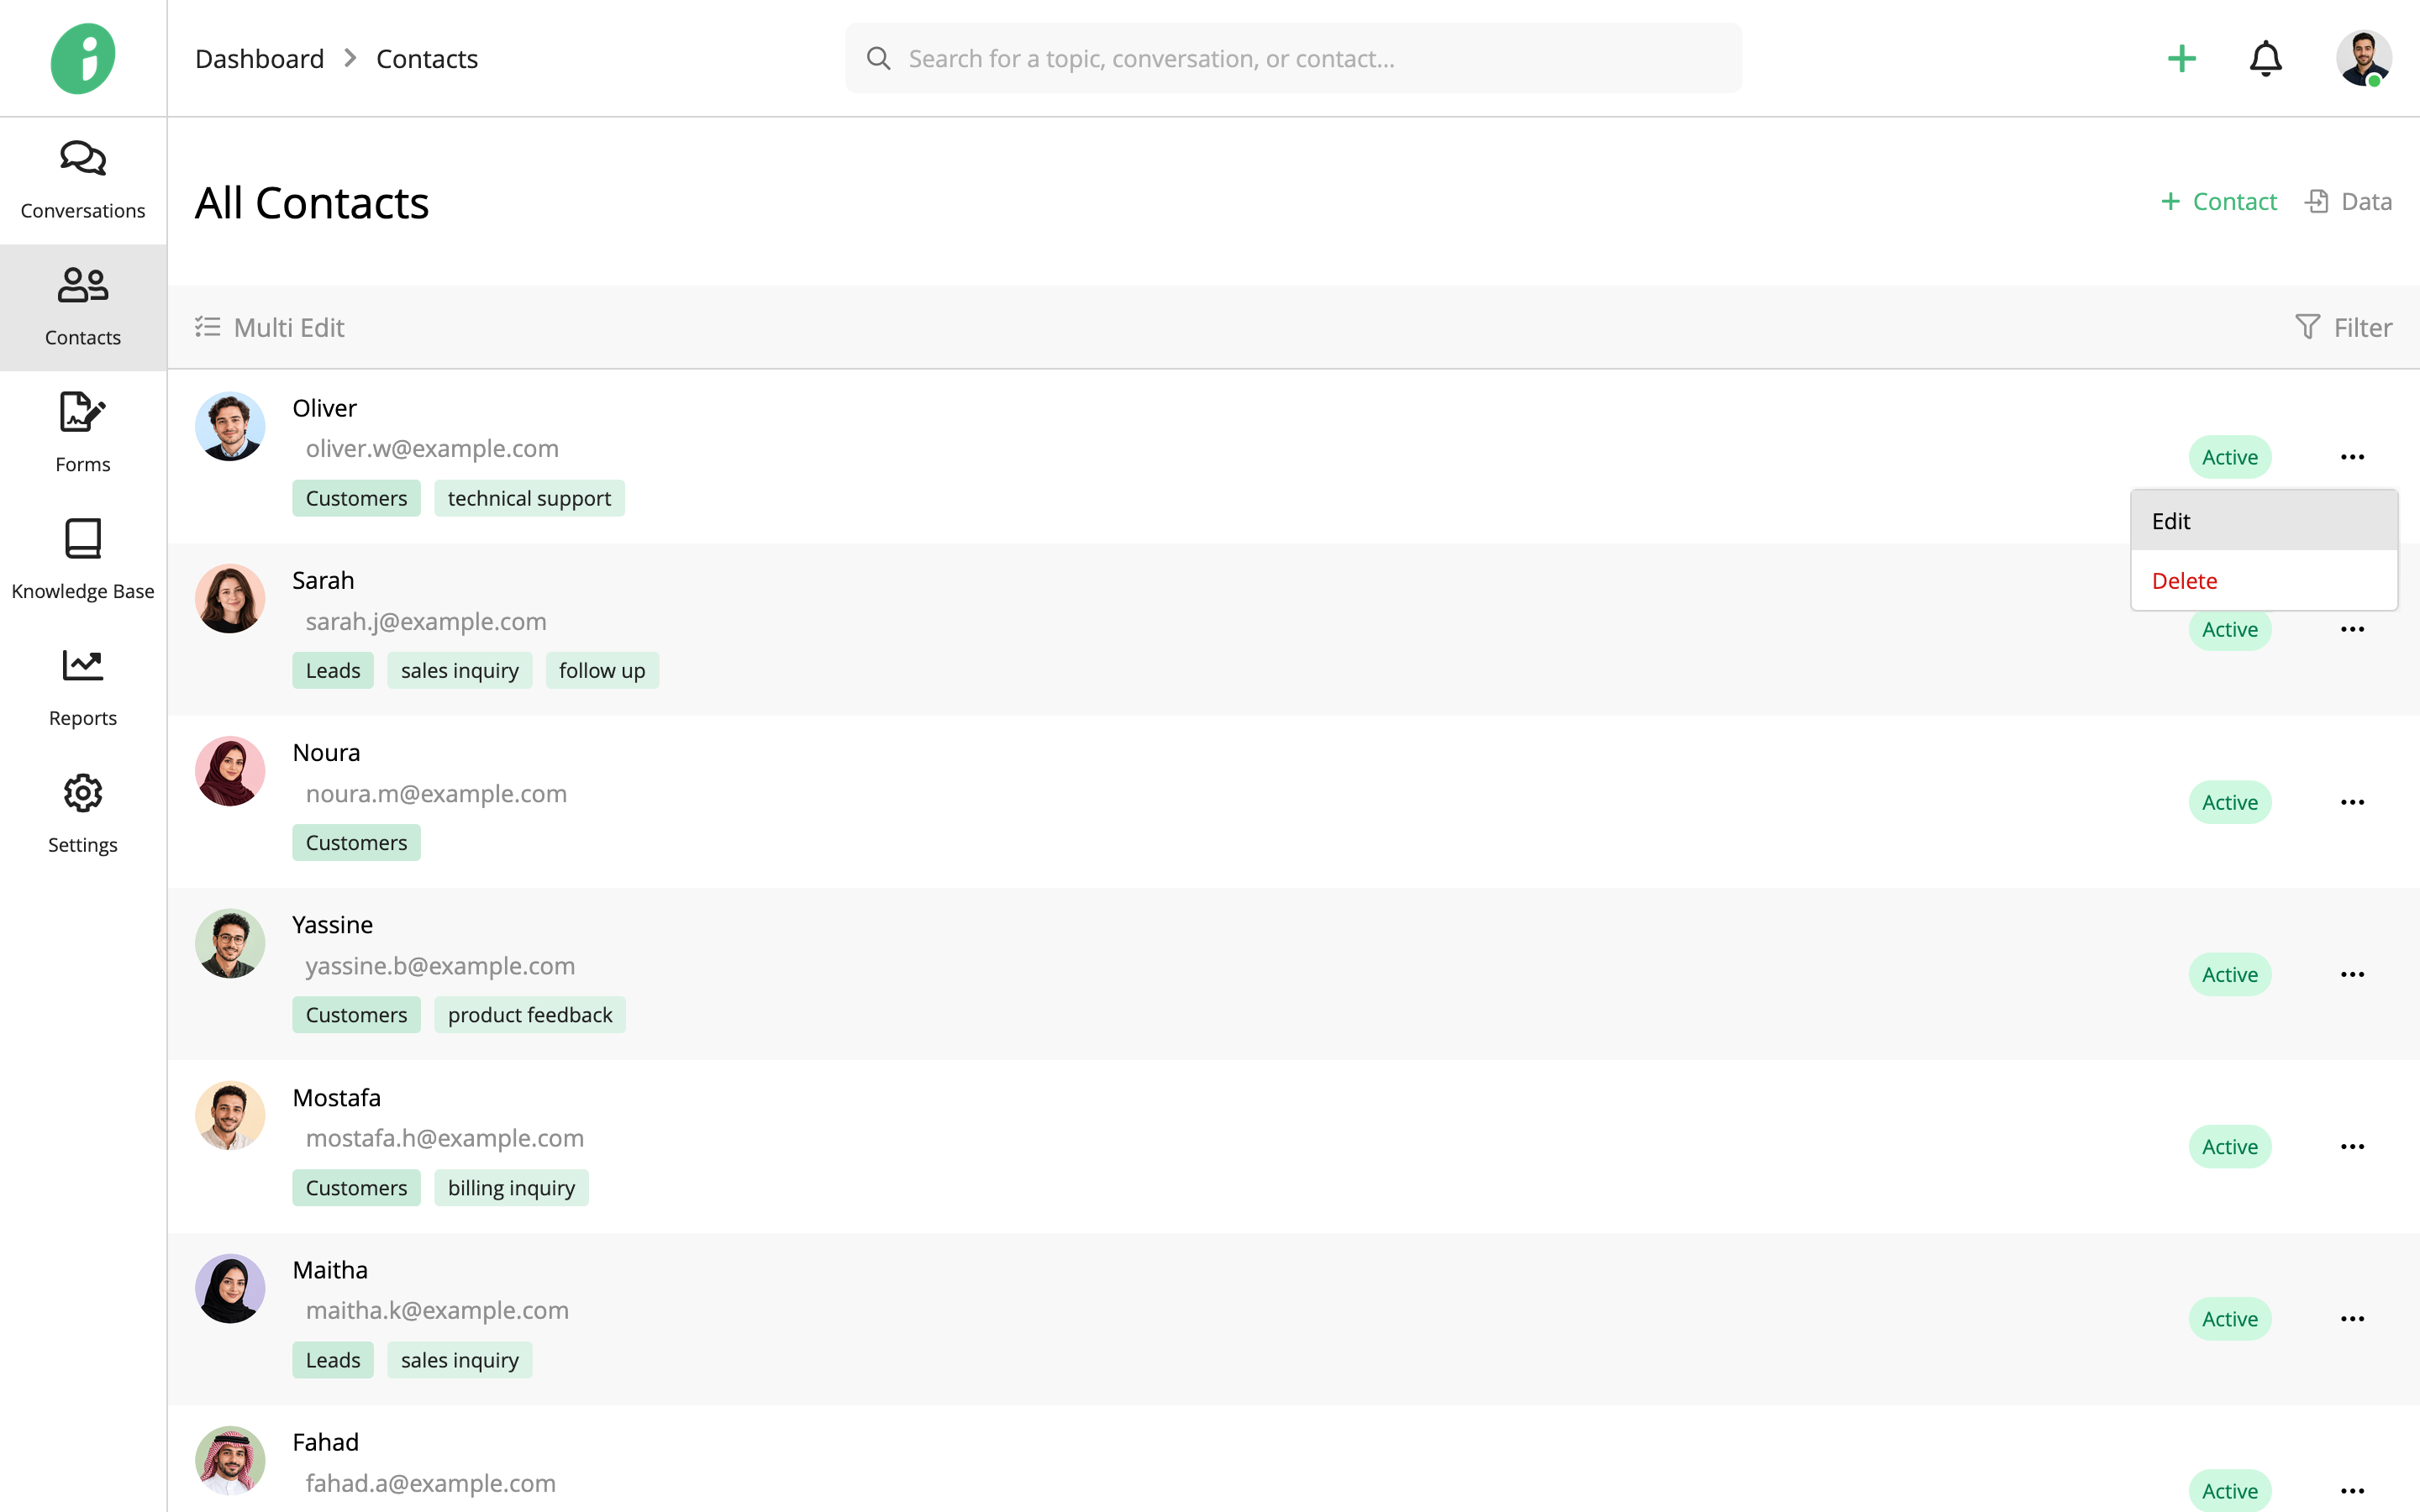
From your Helpdesk, go to Contacts → All Contacts.
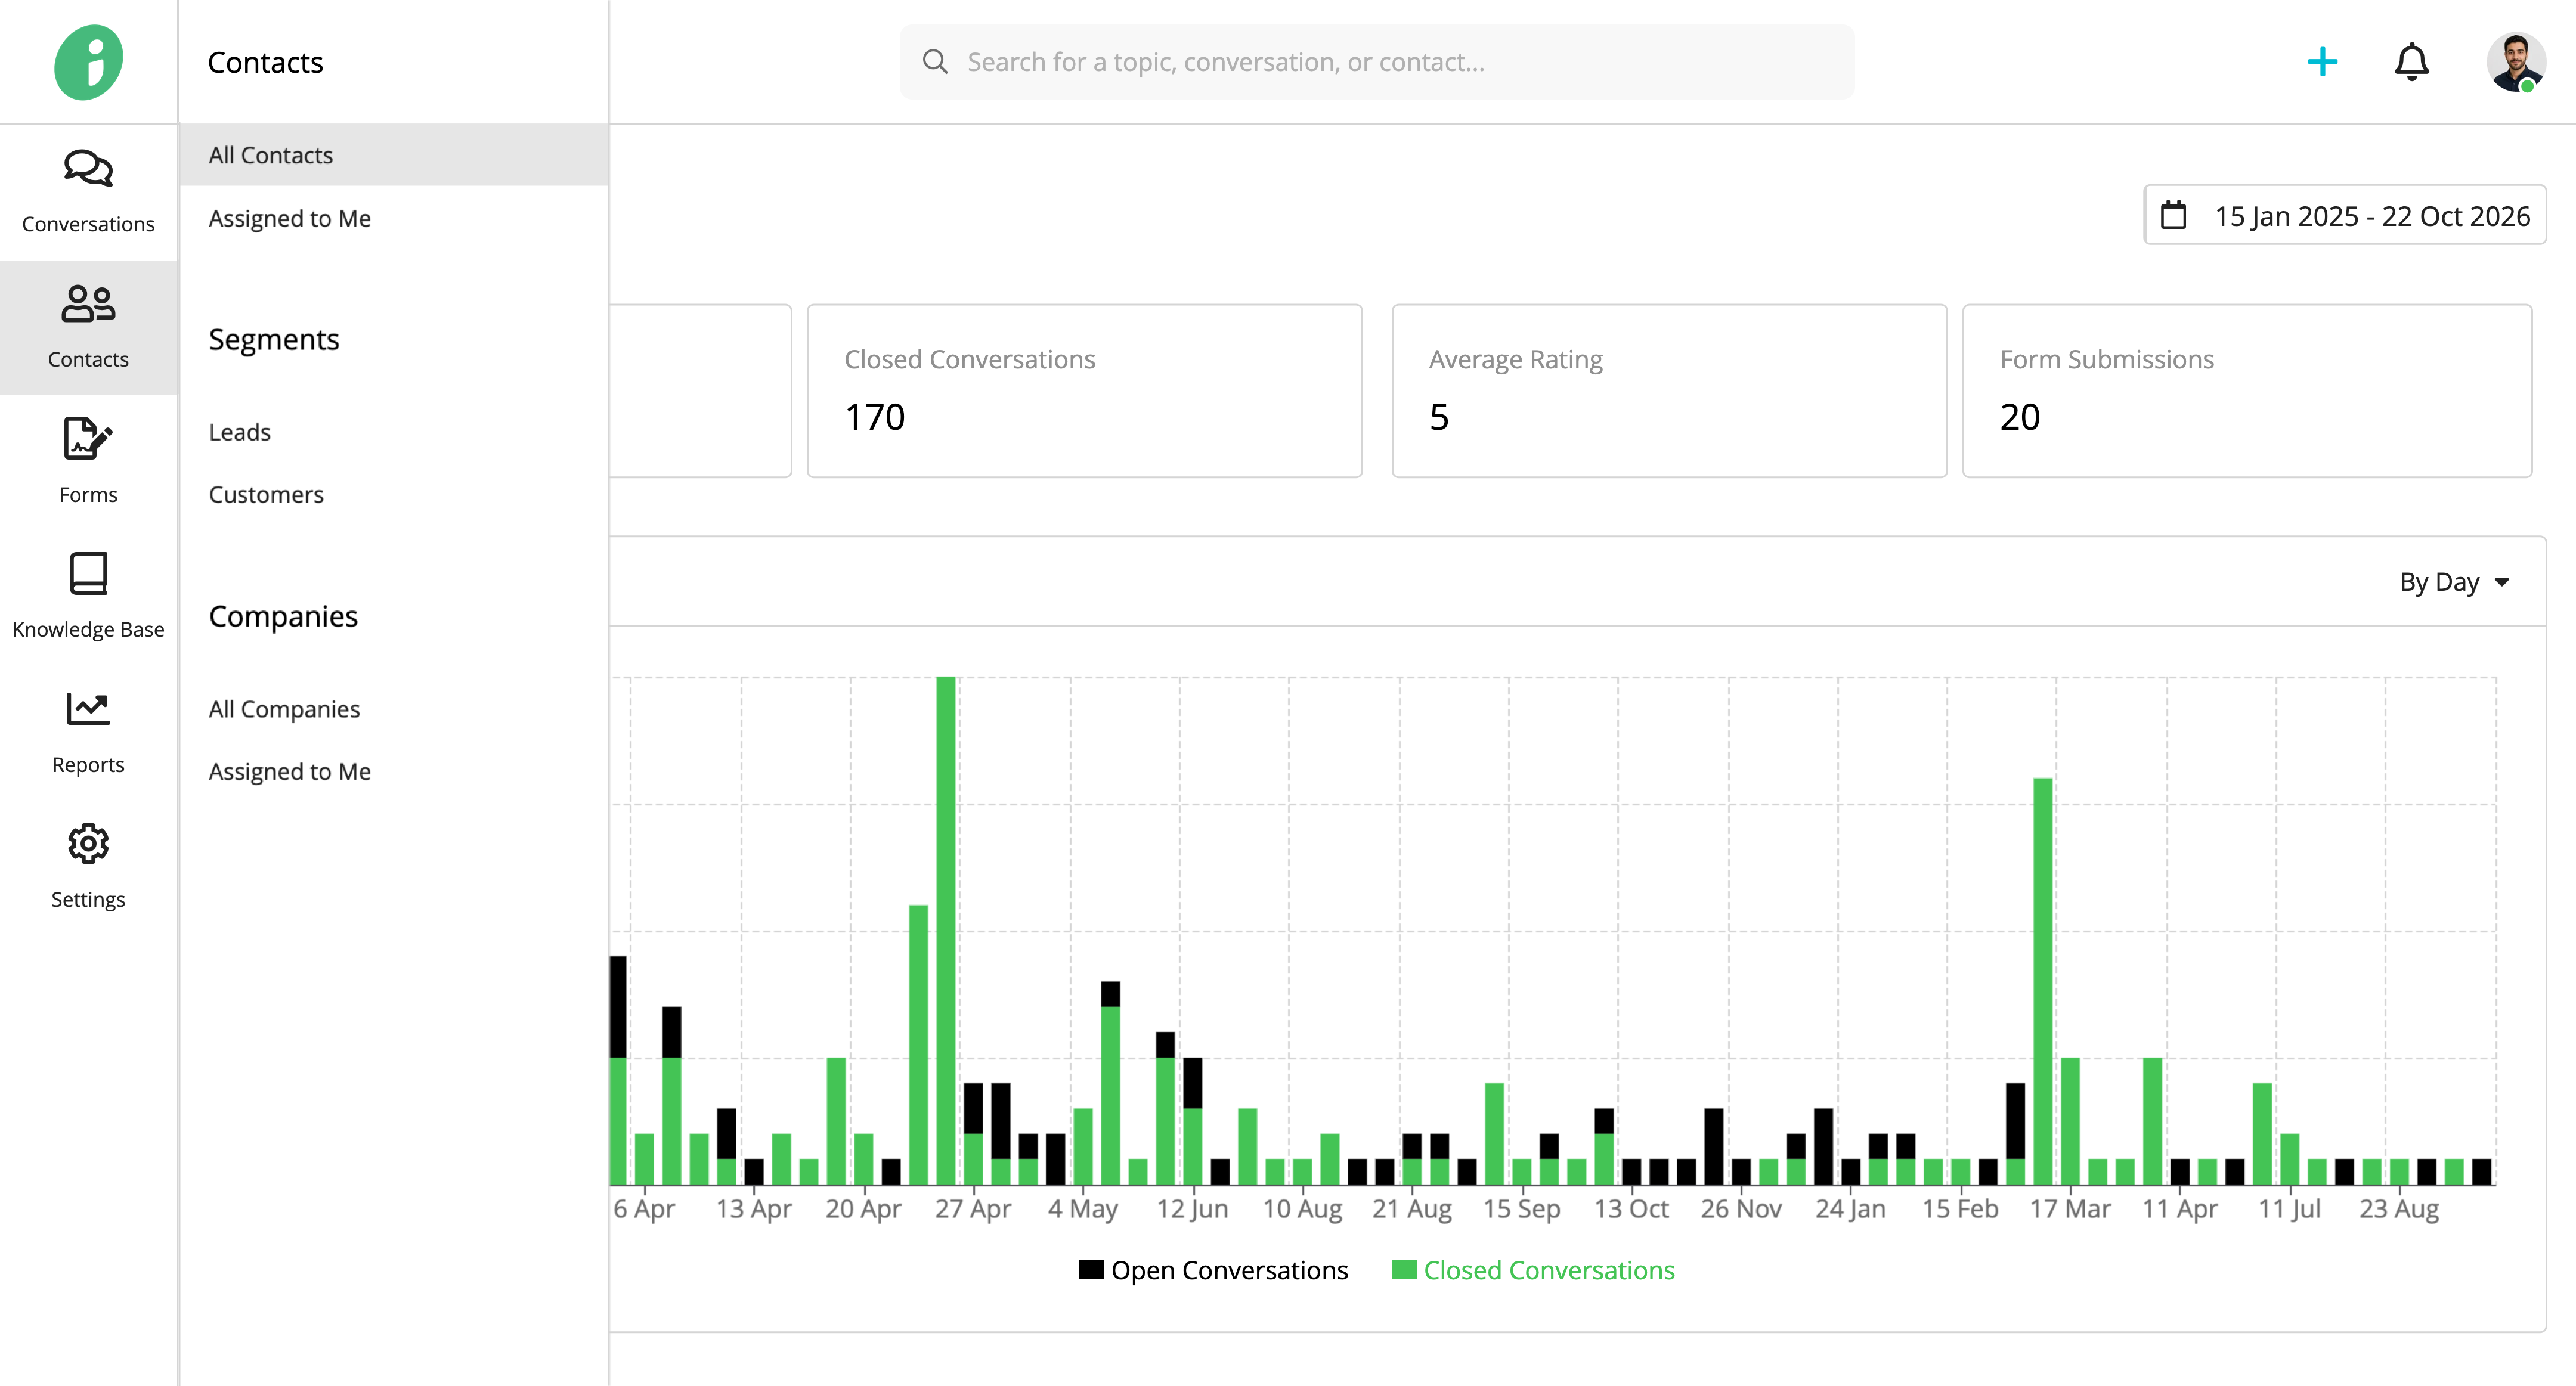
Find the contact you want to update, open its options menu, and select Edit.
Select the custom field group tab, such as Customer ID & Roles.
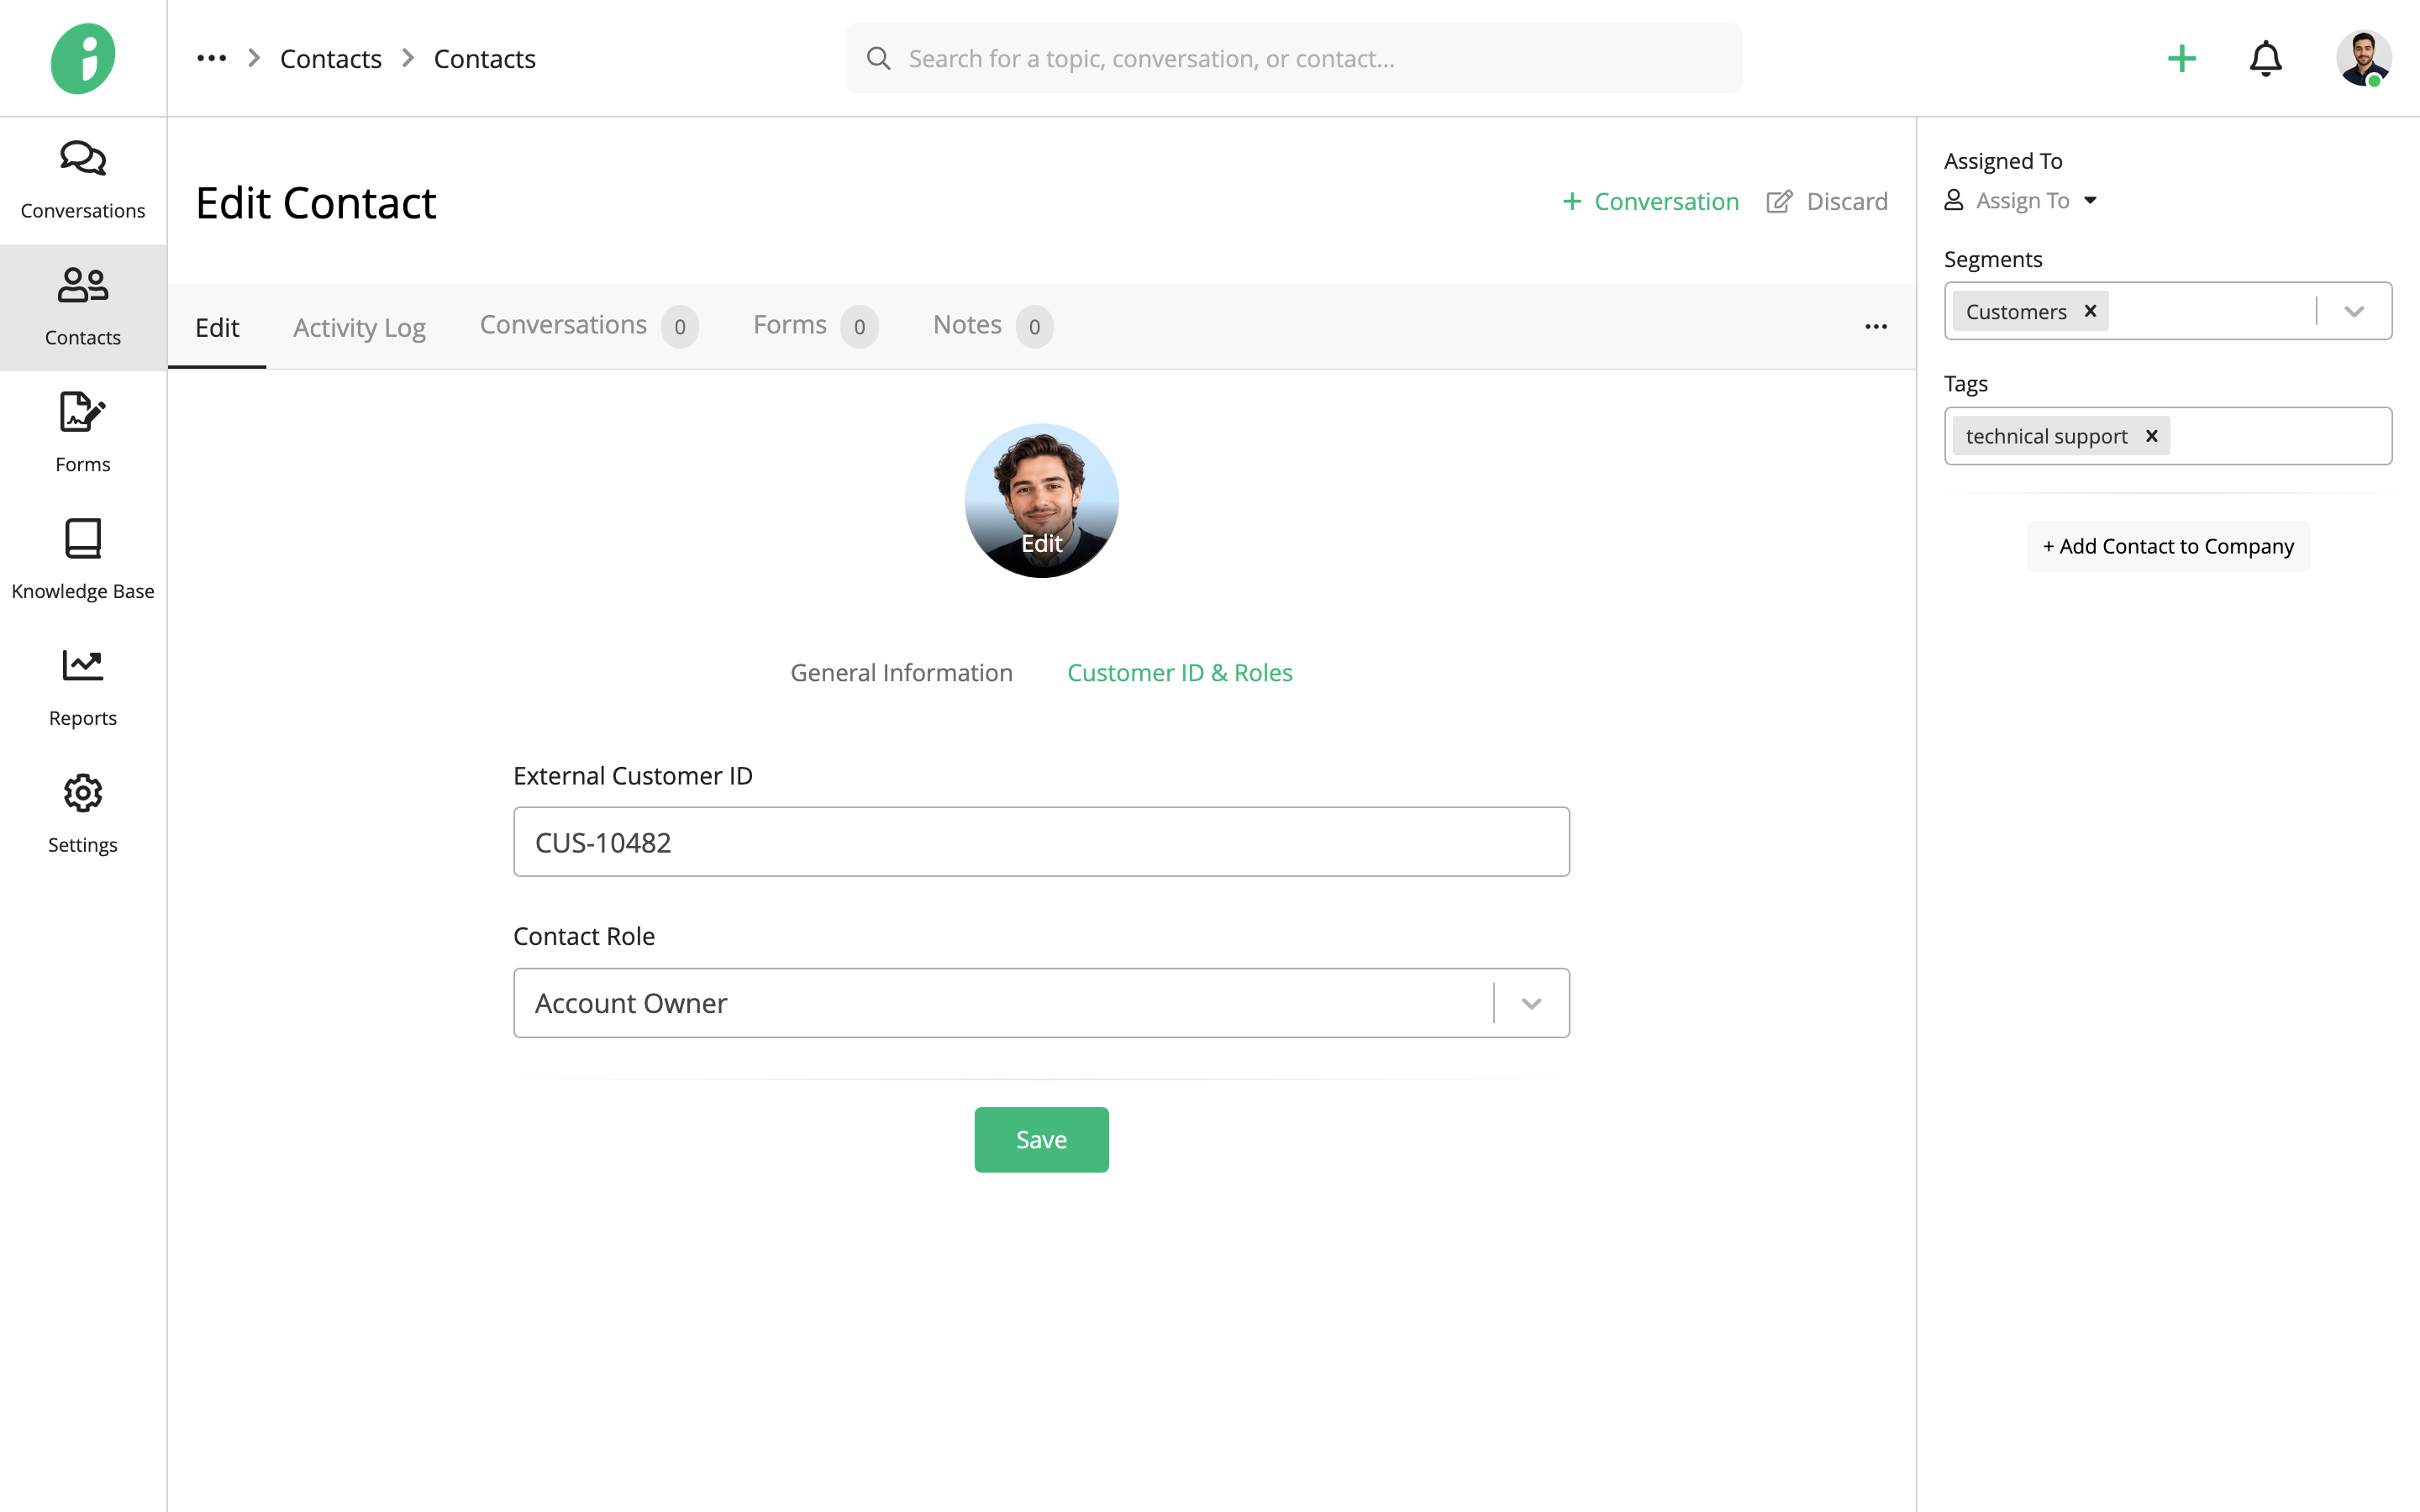
Enter the relevant information in the custom fields, then click Save.
Edit a Custom Field Group
From your Helpdesk, go to Settings → Contacts → Contact Custom Fields.
Find the field group you want to update, open its options menu, and select Edit.
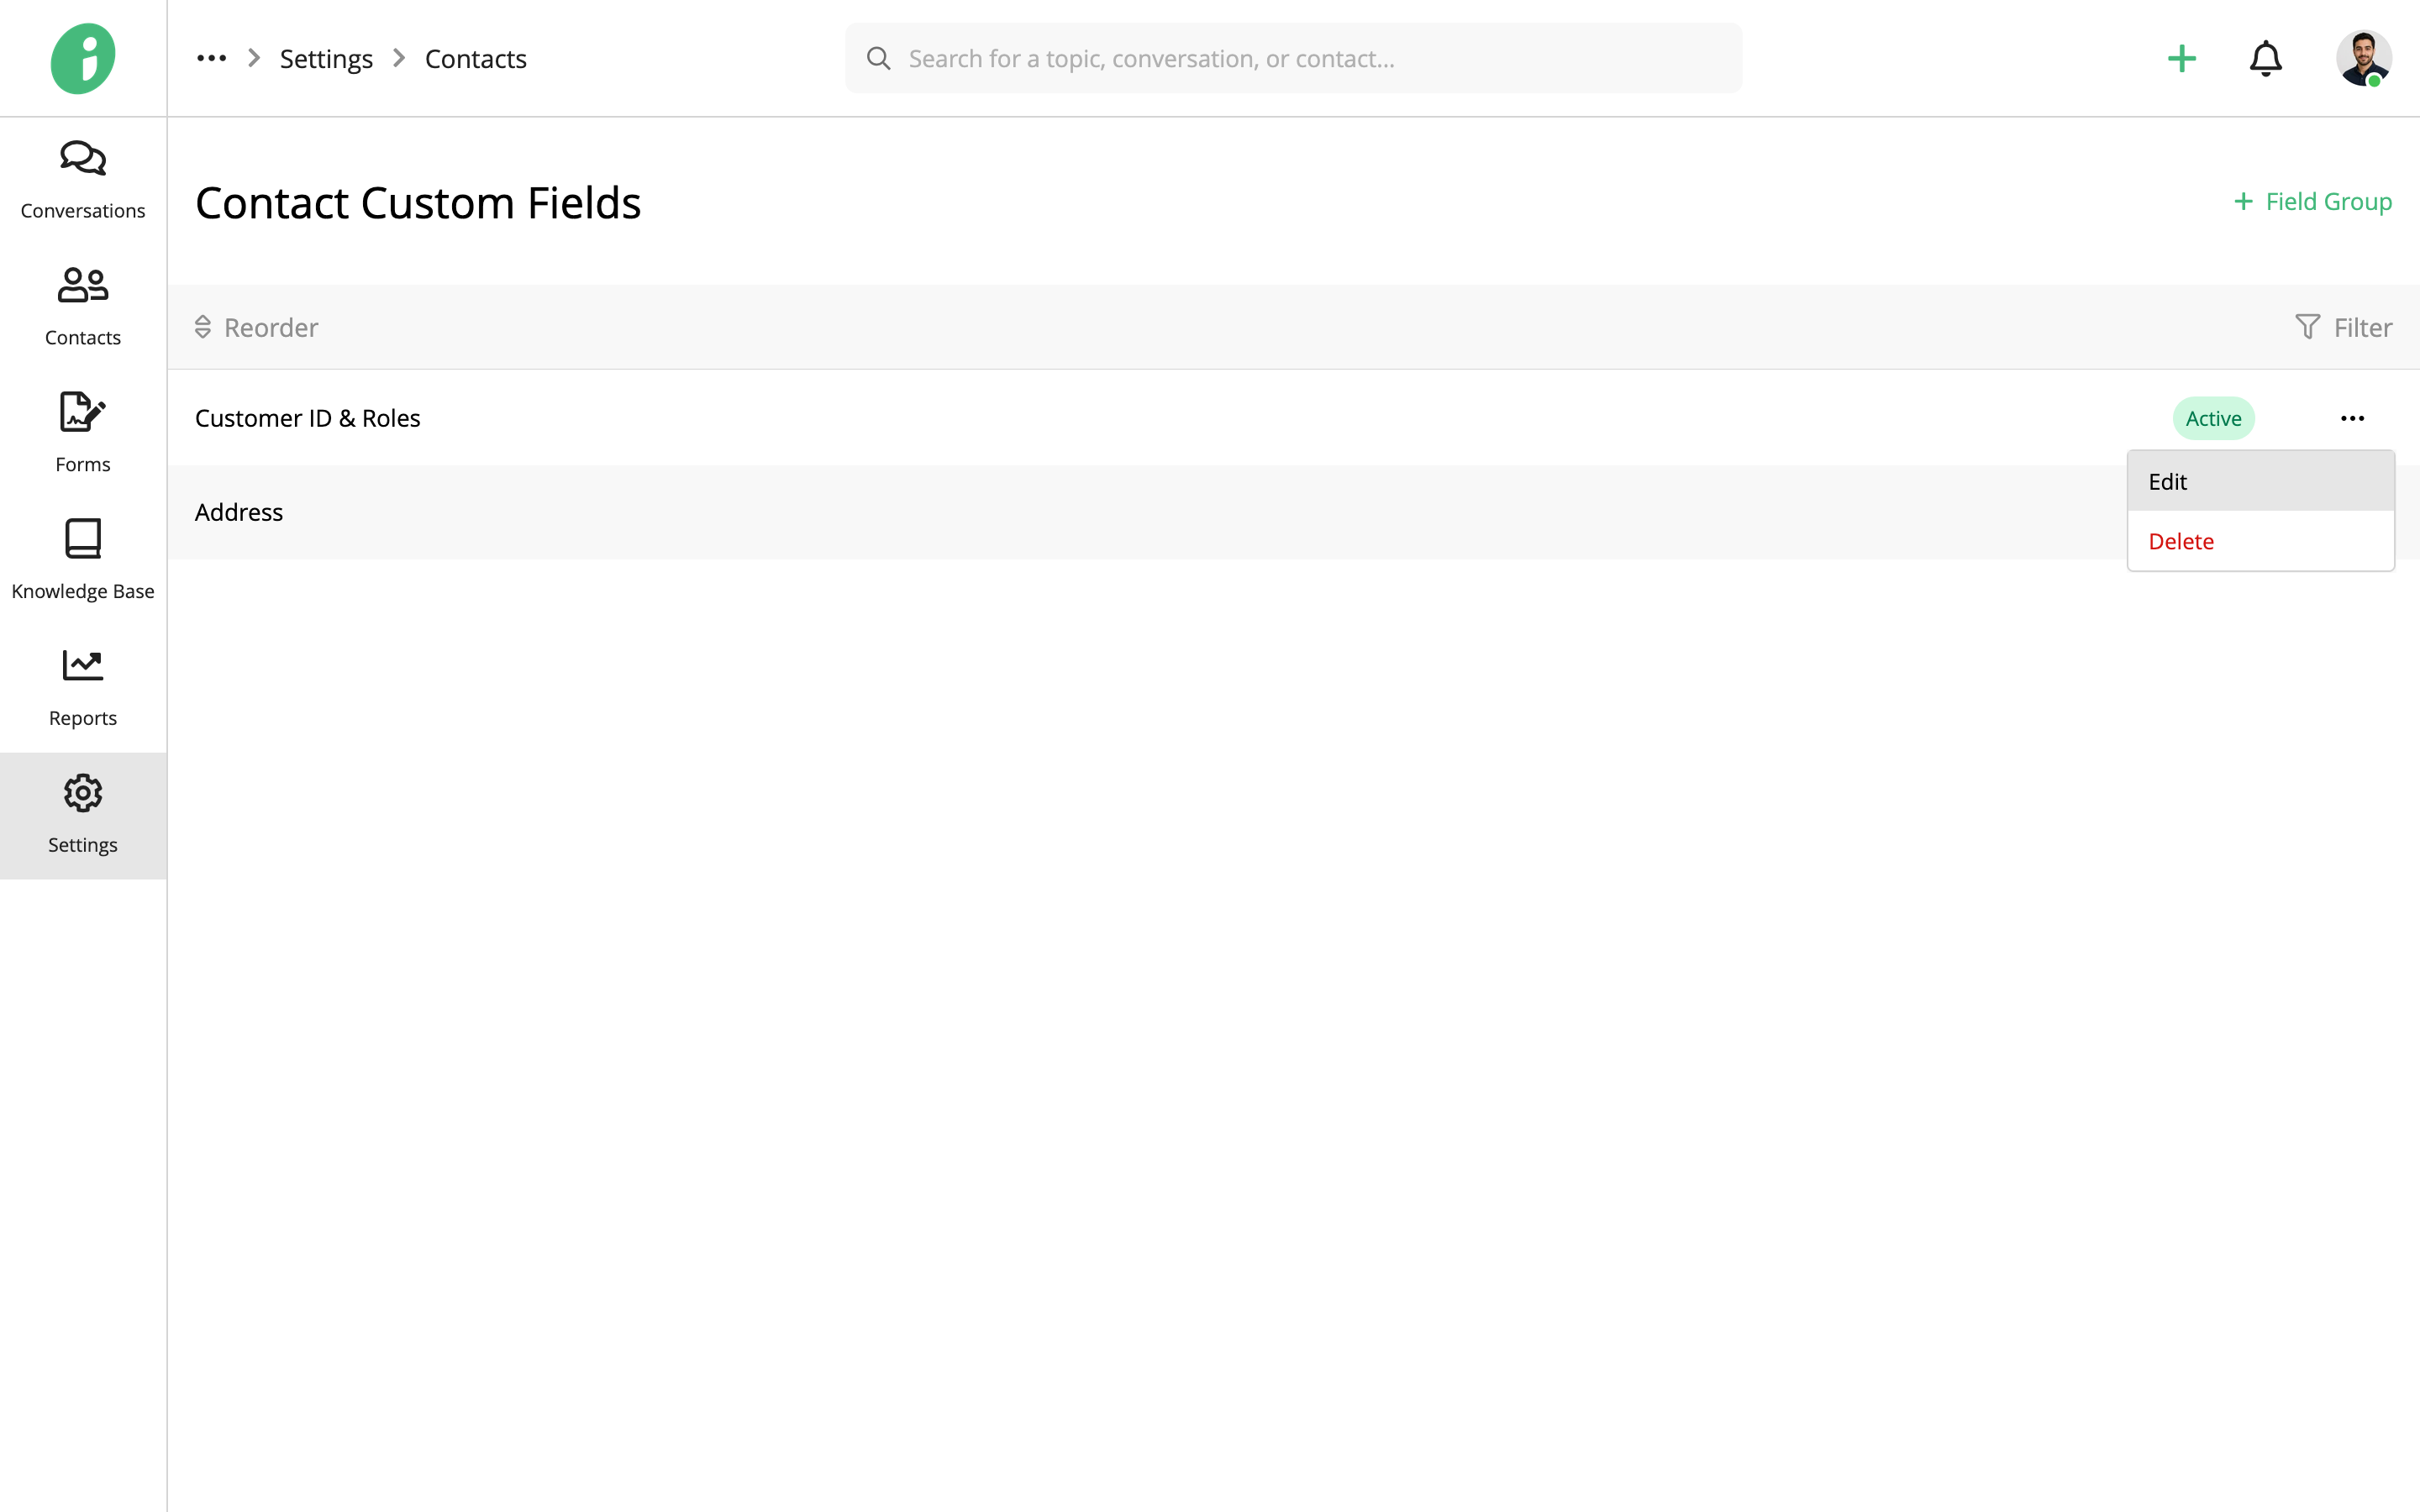
You can update the group’s Basic Settings, add or modify fields under Fields, or change team and agent access under Permissions.
Click Save to apply your changes.