You can add agents to your Zaetoon Helpdesk, assign them to teams, manage their permissions, and control their access to your Helpdesk.
Add an Agent
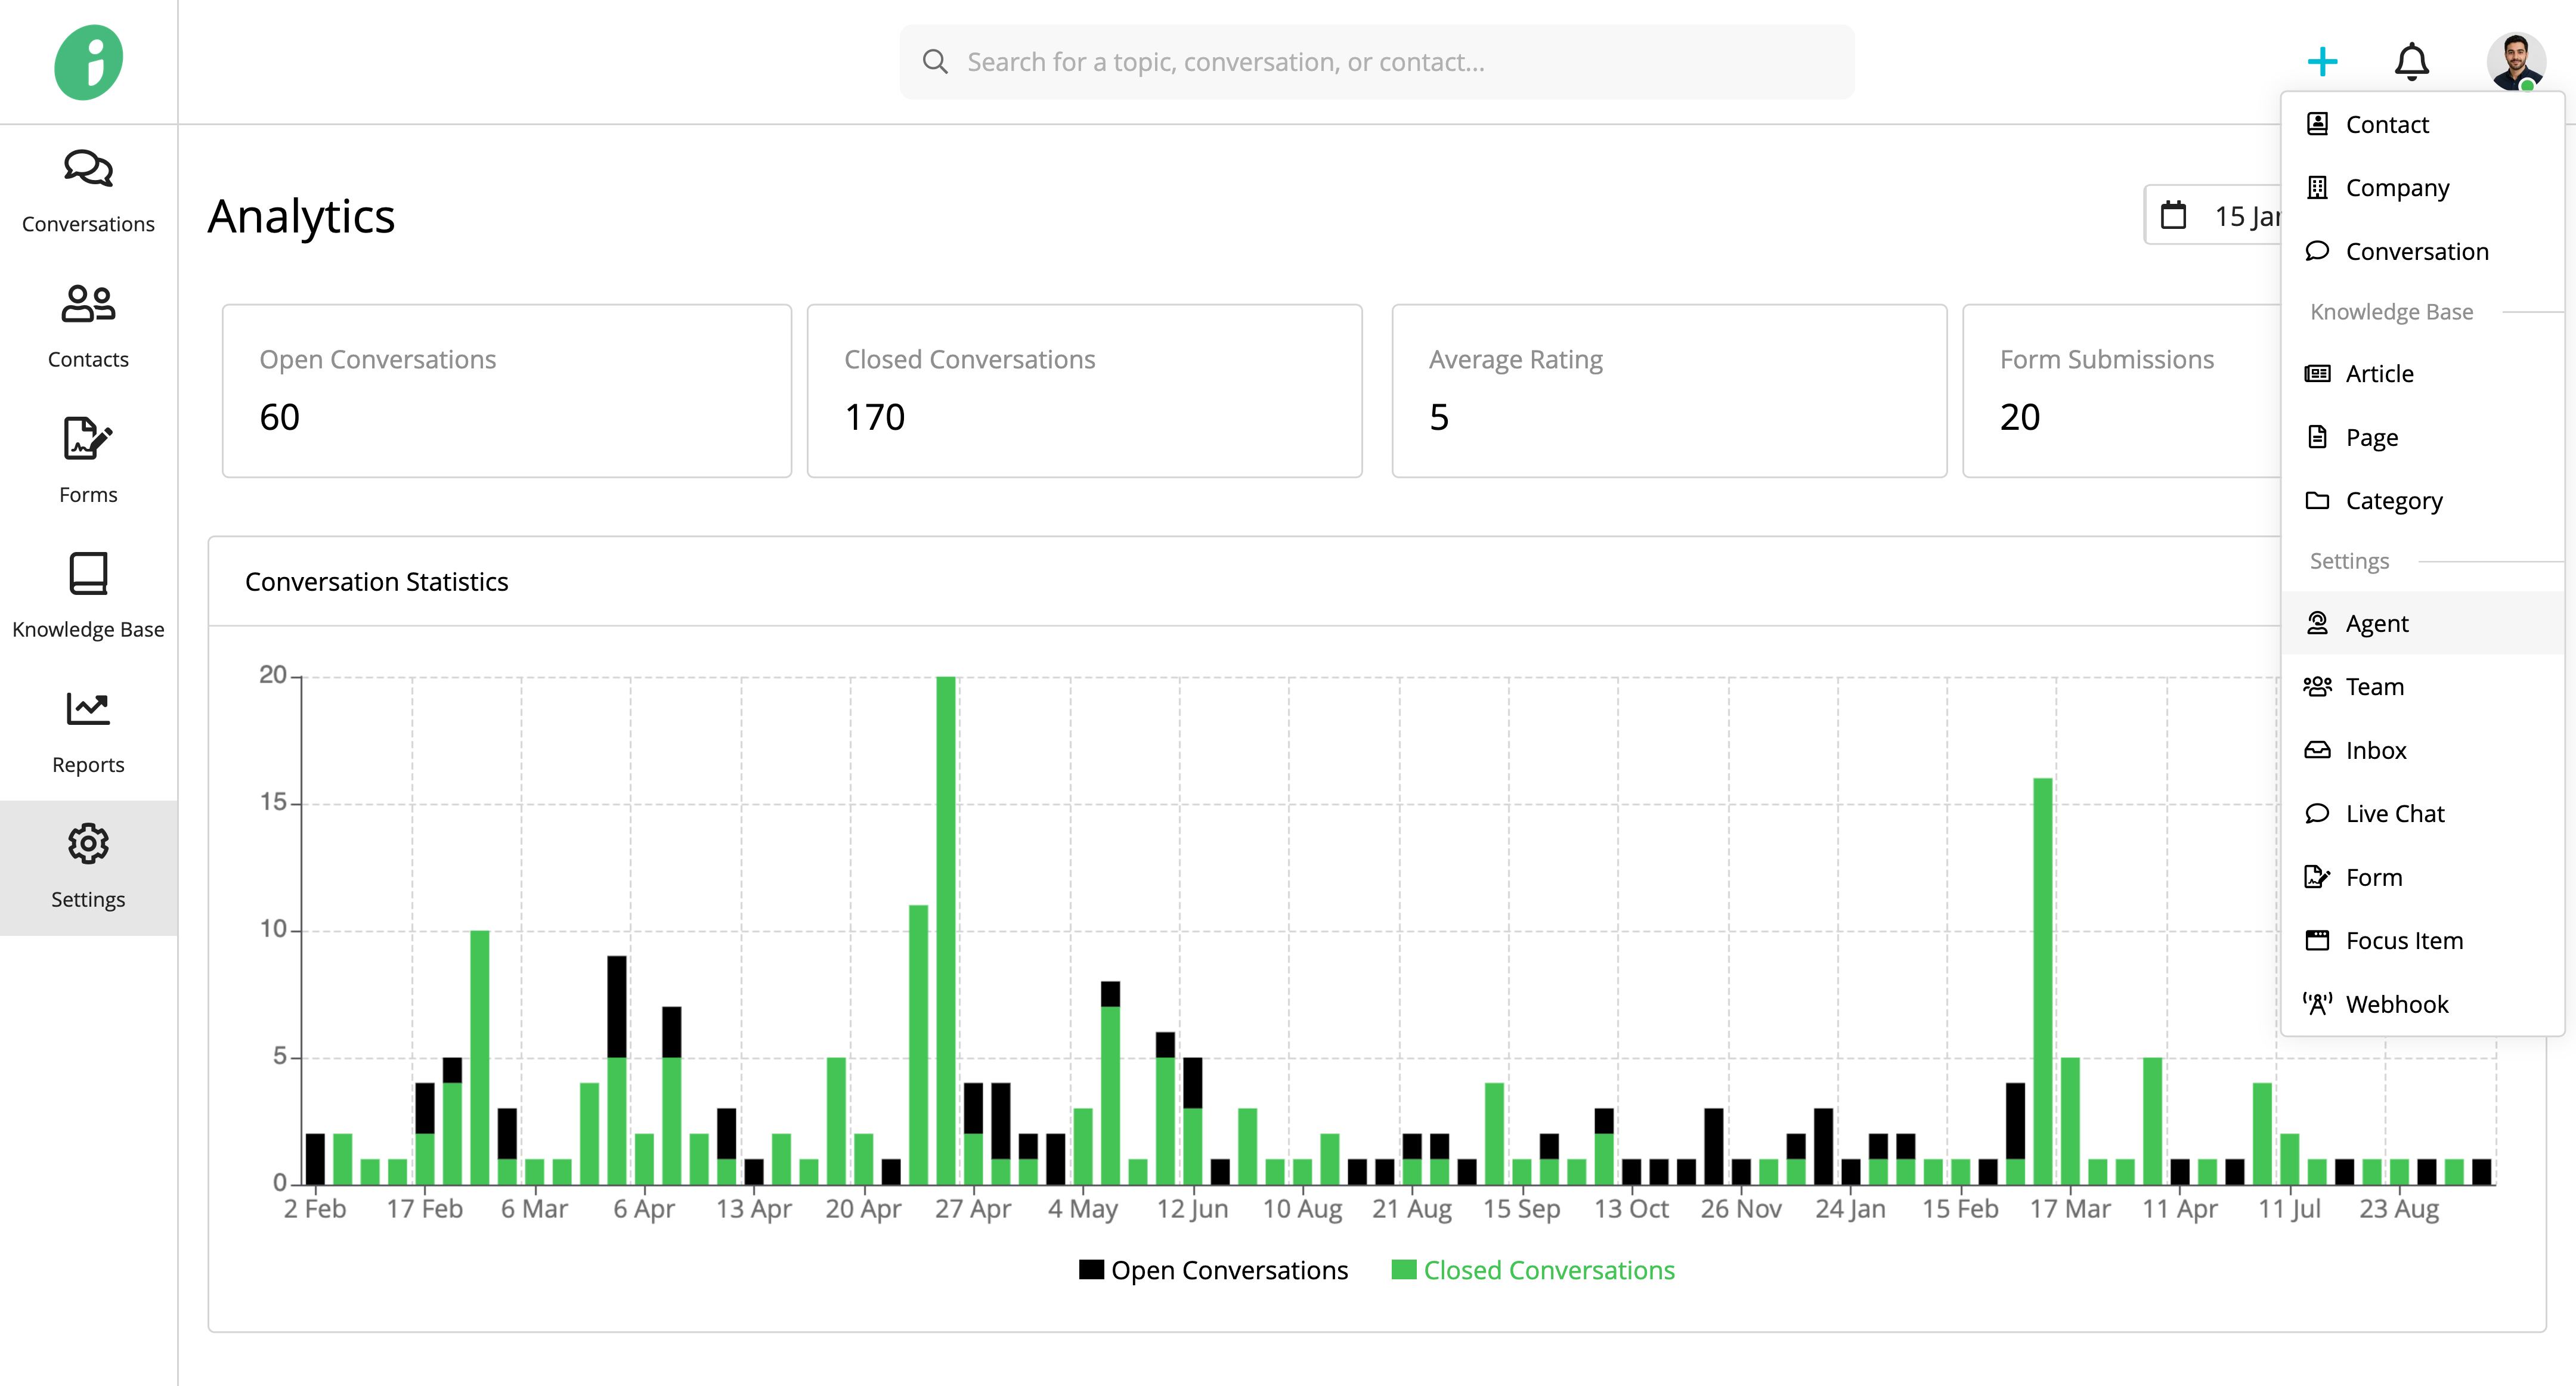
From your Helpdesk, click + Add in the top-right corner and select Agent.
Basic Settings
Under Basic Settings, enter the following information:
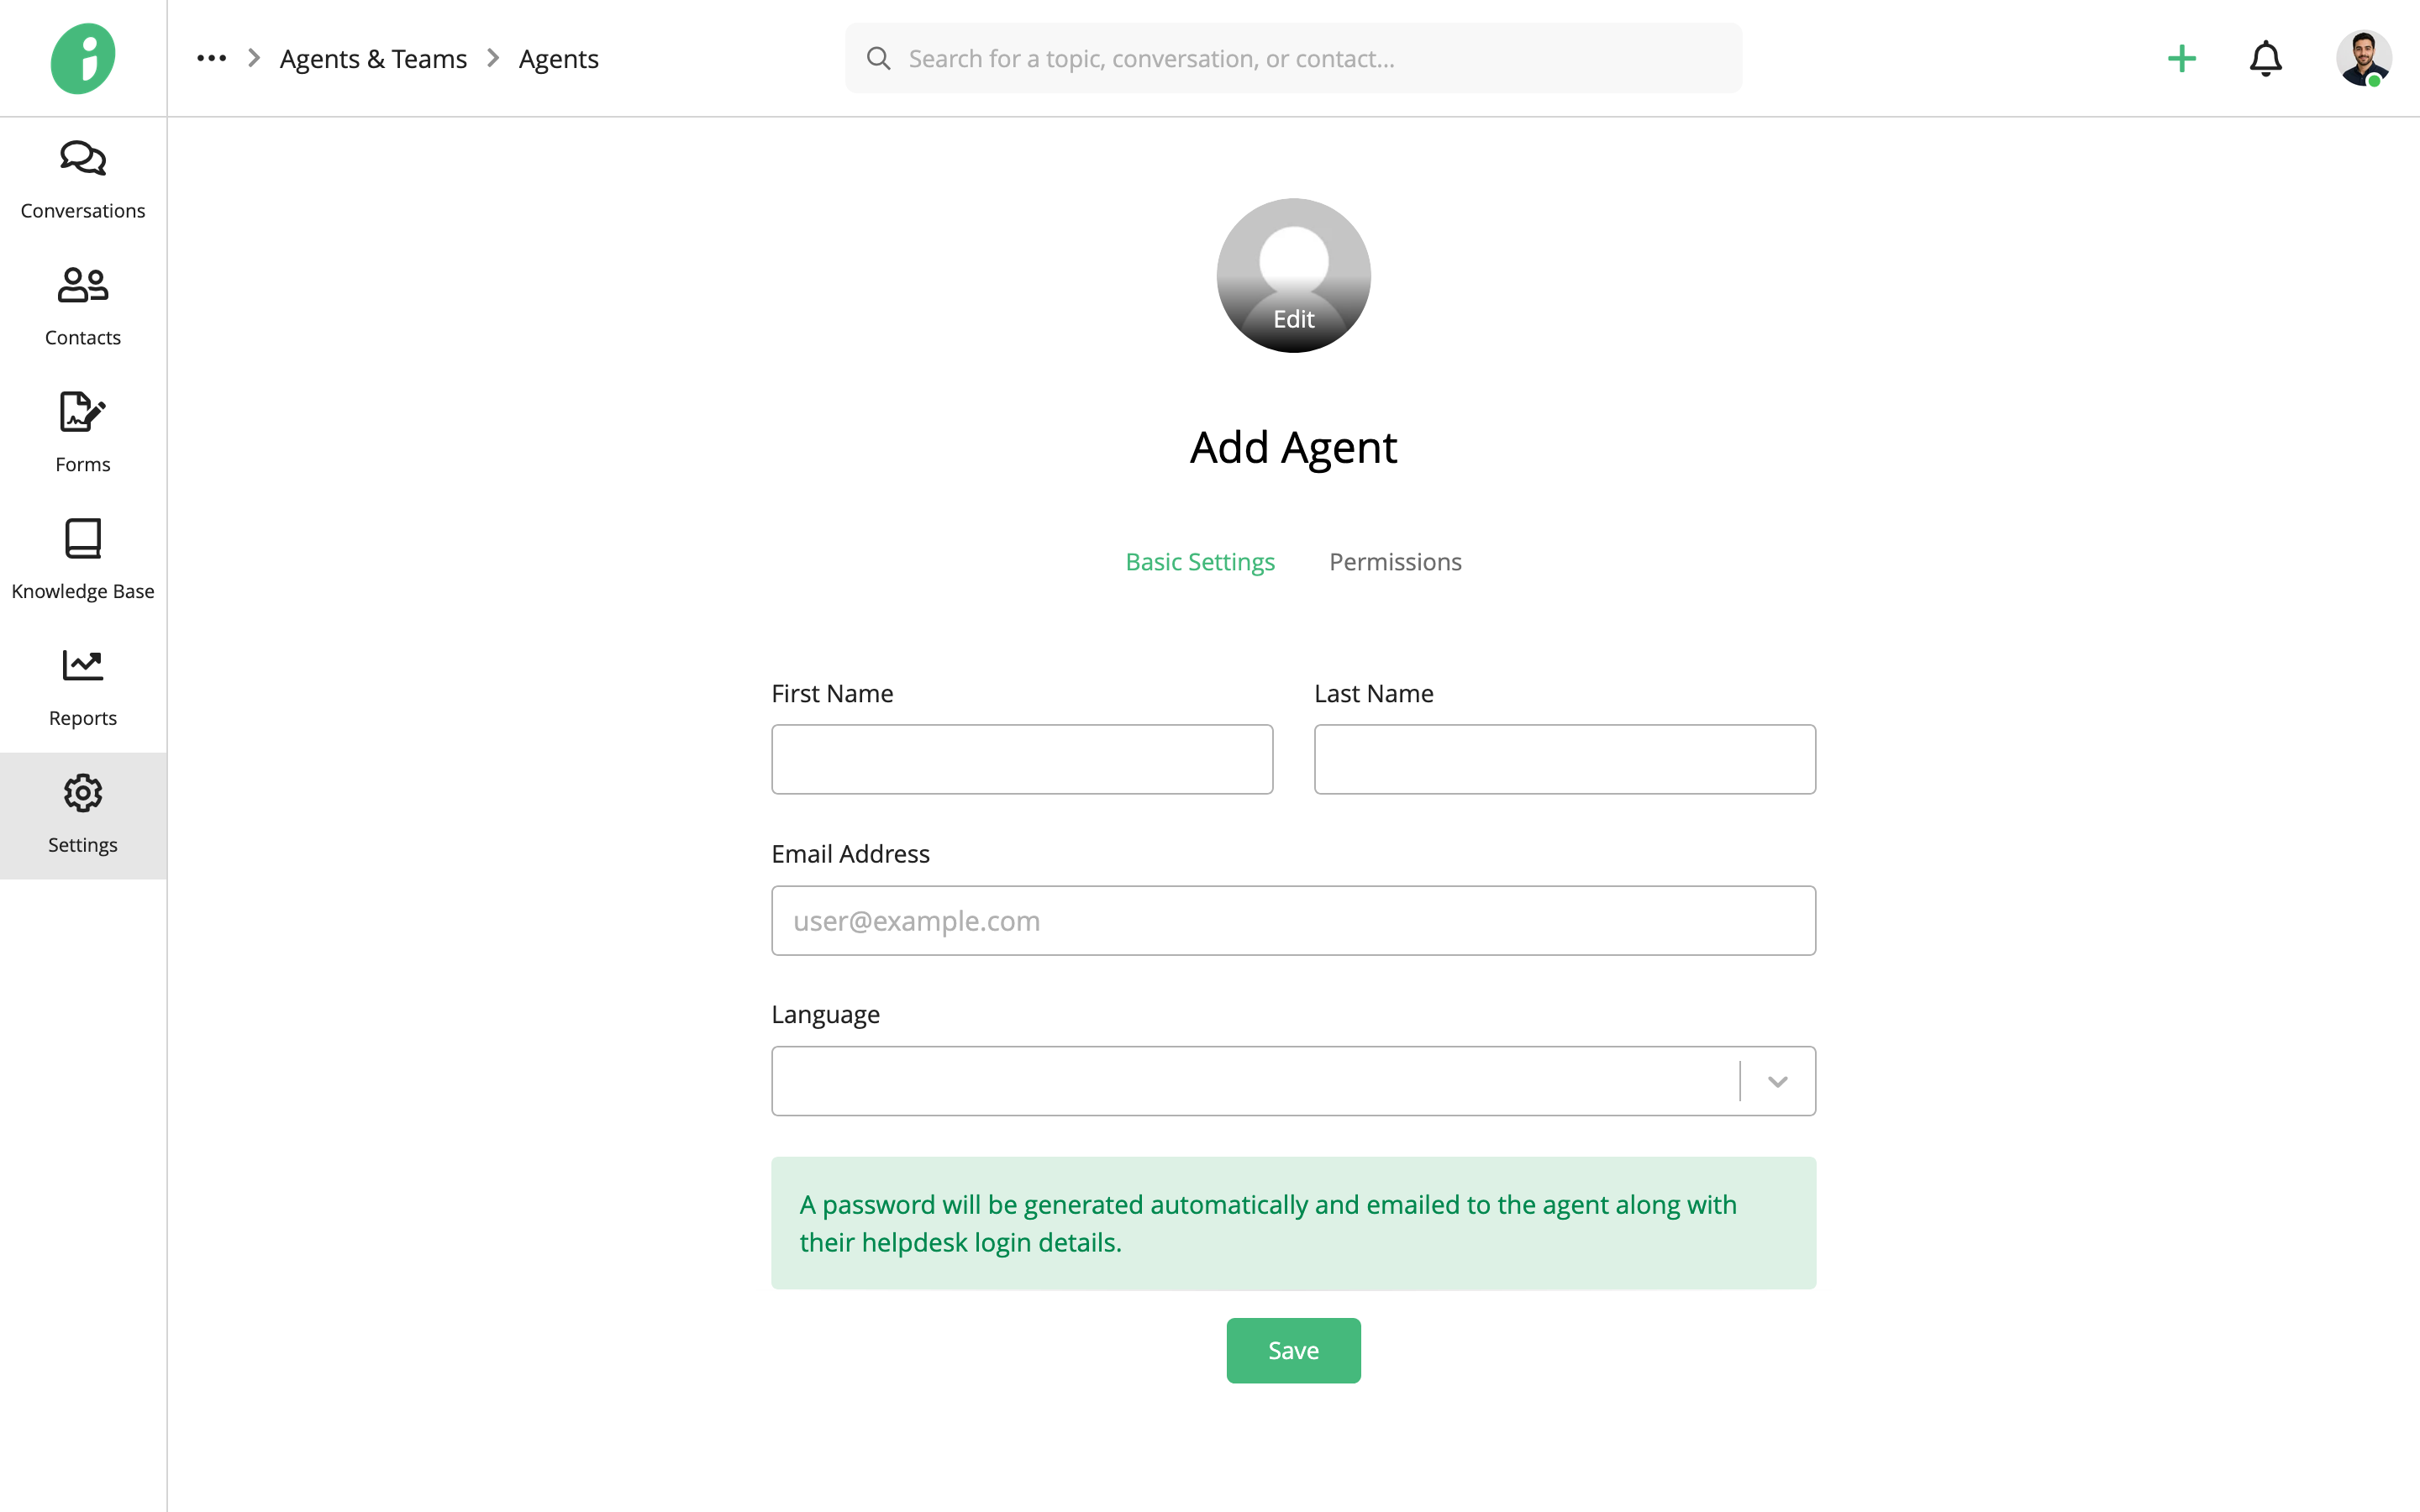
- First Name: Enter the agent’s first name.
- Last Name: Enter the agent’s last name.
- Email Address: Enter the email address the agent will use to sign in to your Helpdesk.
- Language: Select the language displayed to the agent when they sign in.
Permissions
Select Permissions and configure the following:
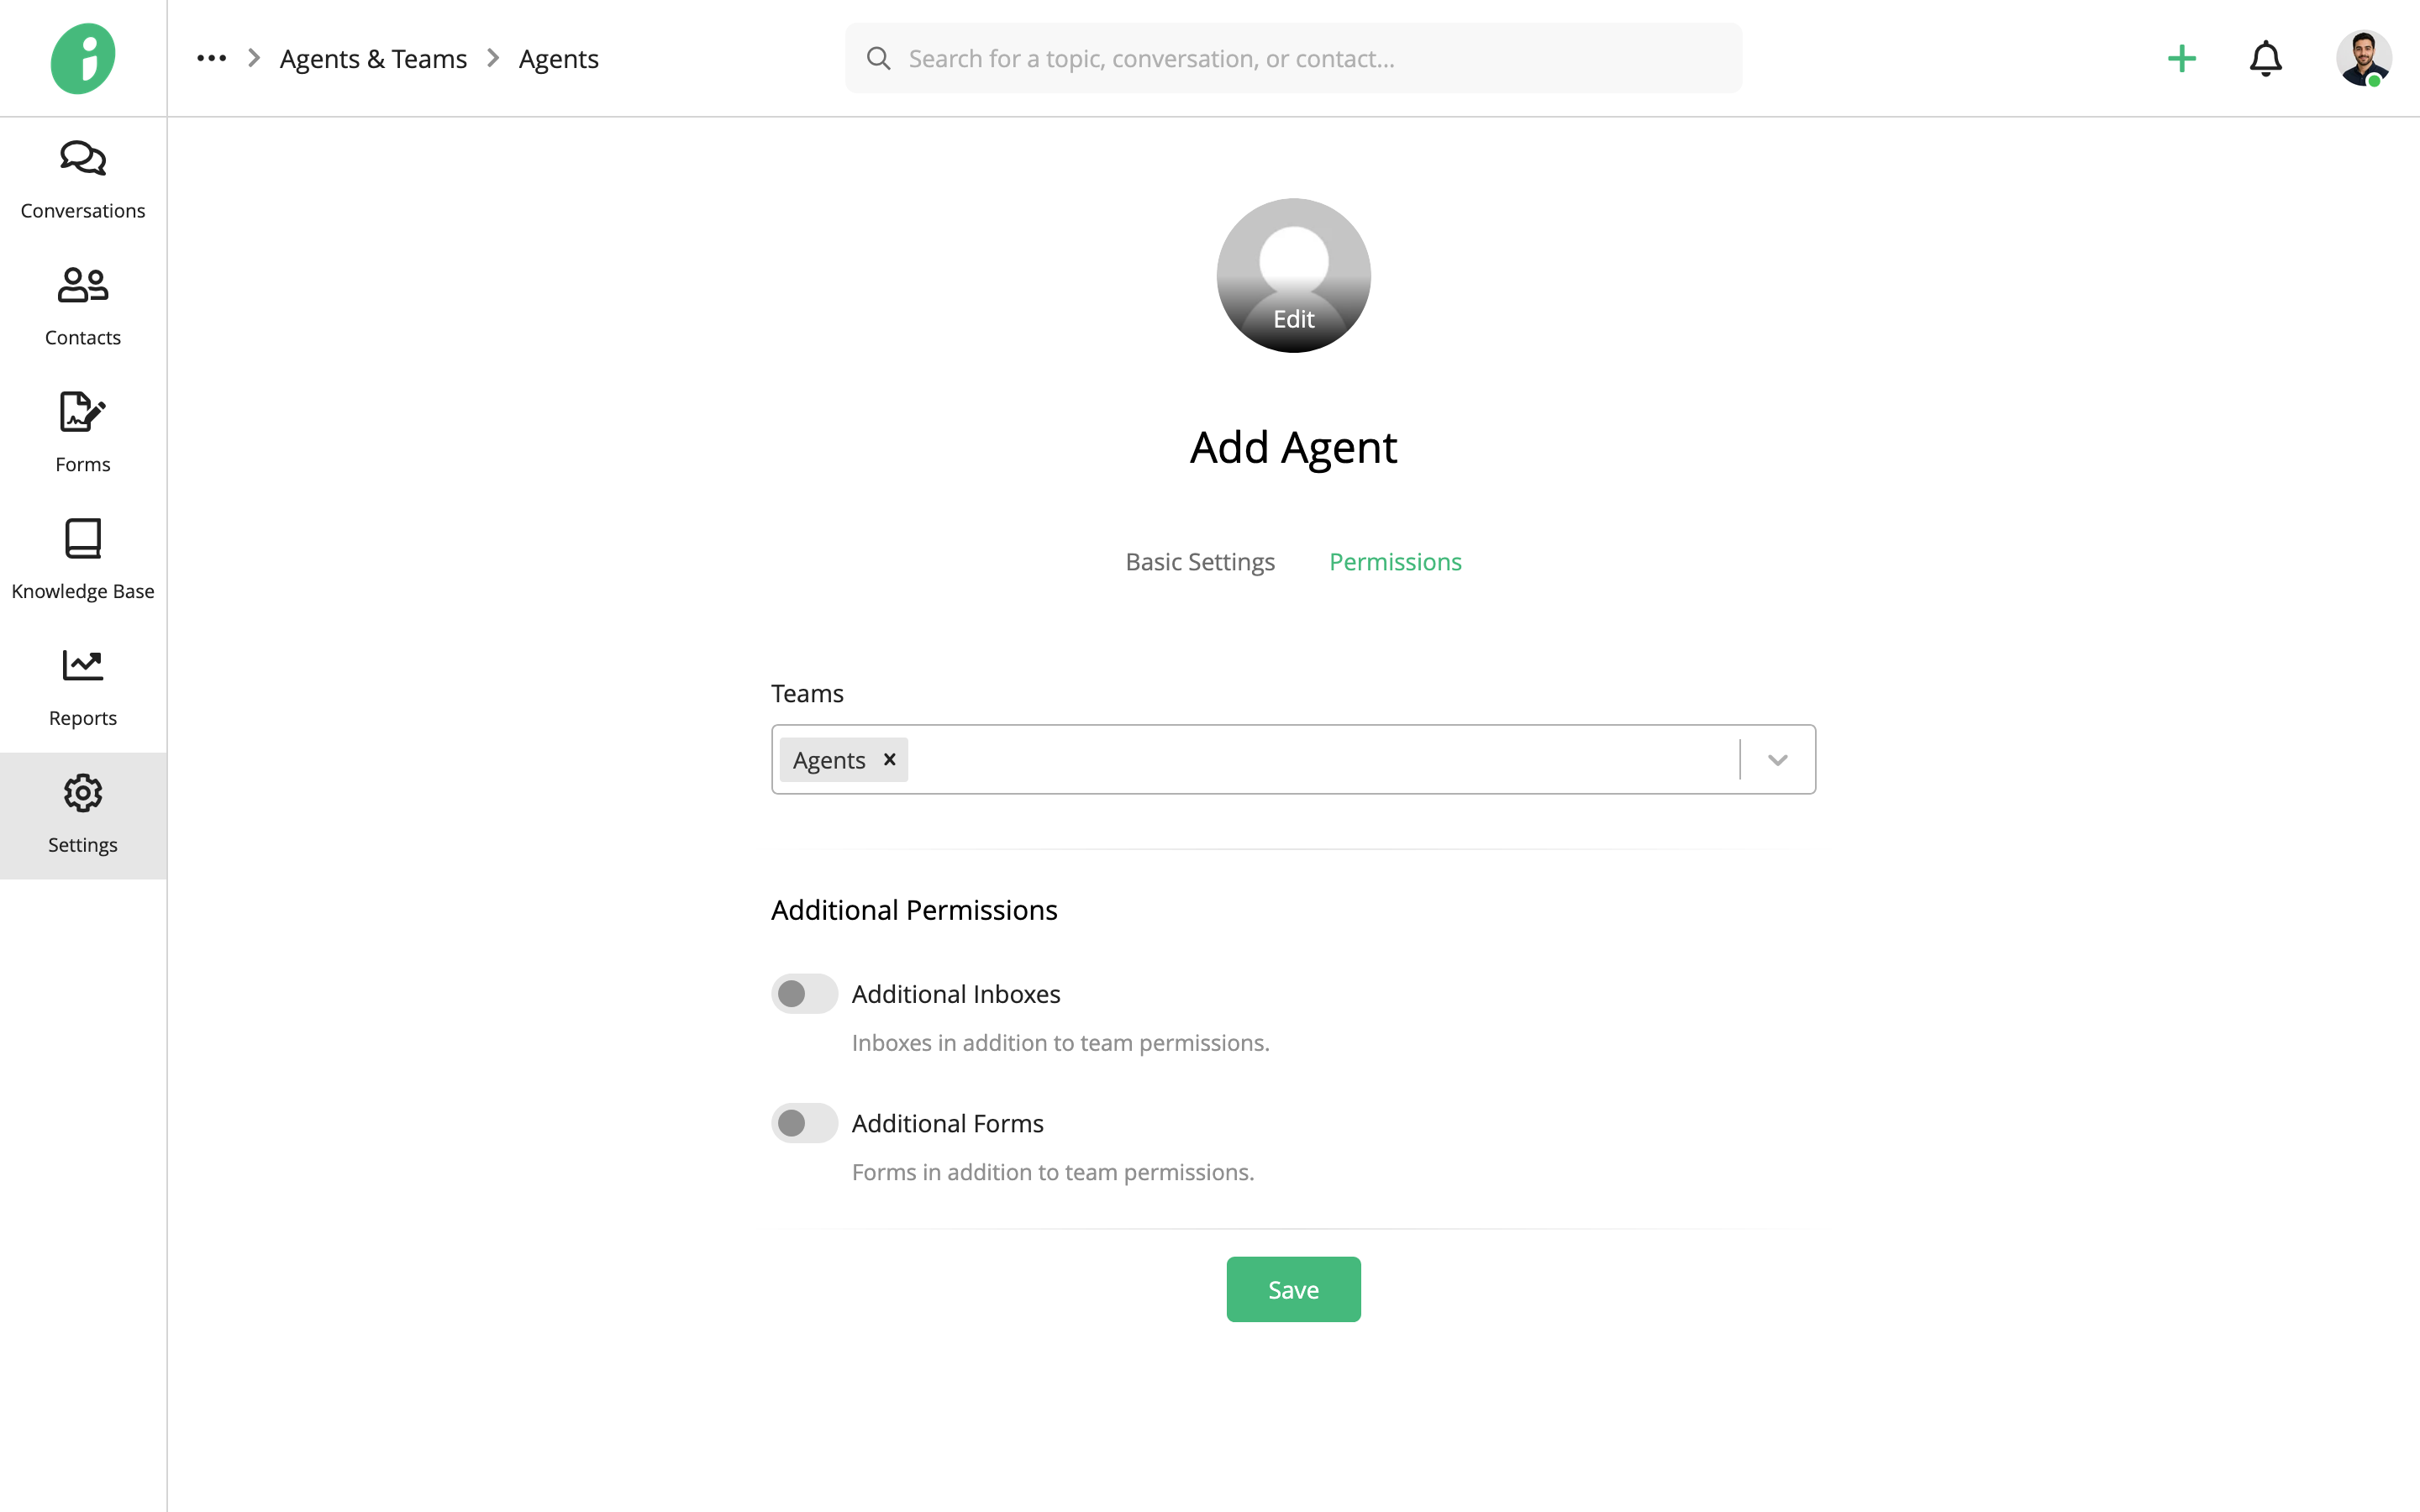
- Teams: Select the teams the agent will belong to.
- Additional Inboxes: Enable this option to give the agent access to inboxes beyond those available through their teams.
- Additional Forms: Enable this option to give the agent access to forms beyond those available through their teams.
Click Save to add the agent.
Zaetoon automatically generates a password and sends the agent an email containing their sign-in details, including their email address, password, and Helpdesk dashboard link.
Edit an Agent
From your Helpdesk, go to Settings → Agents & Teams → Agents.
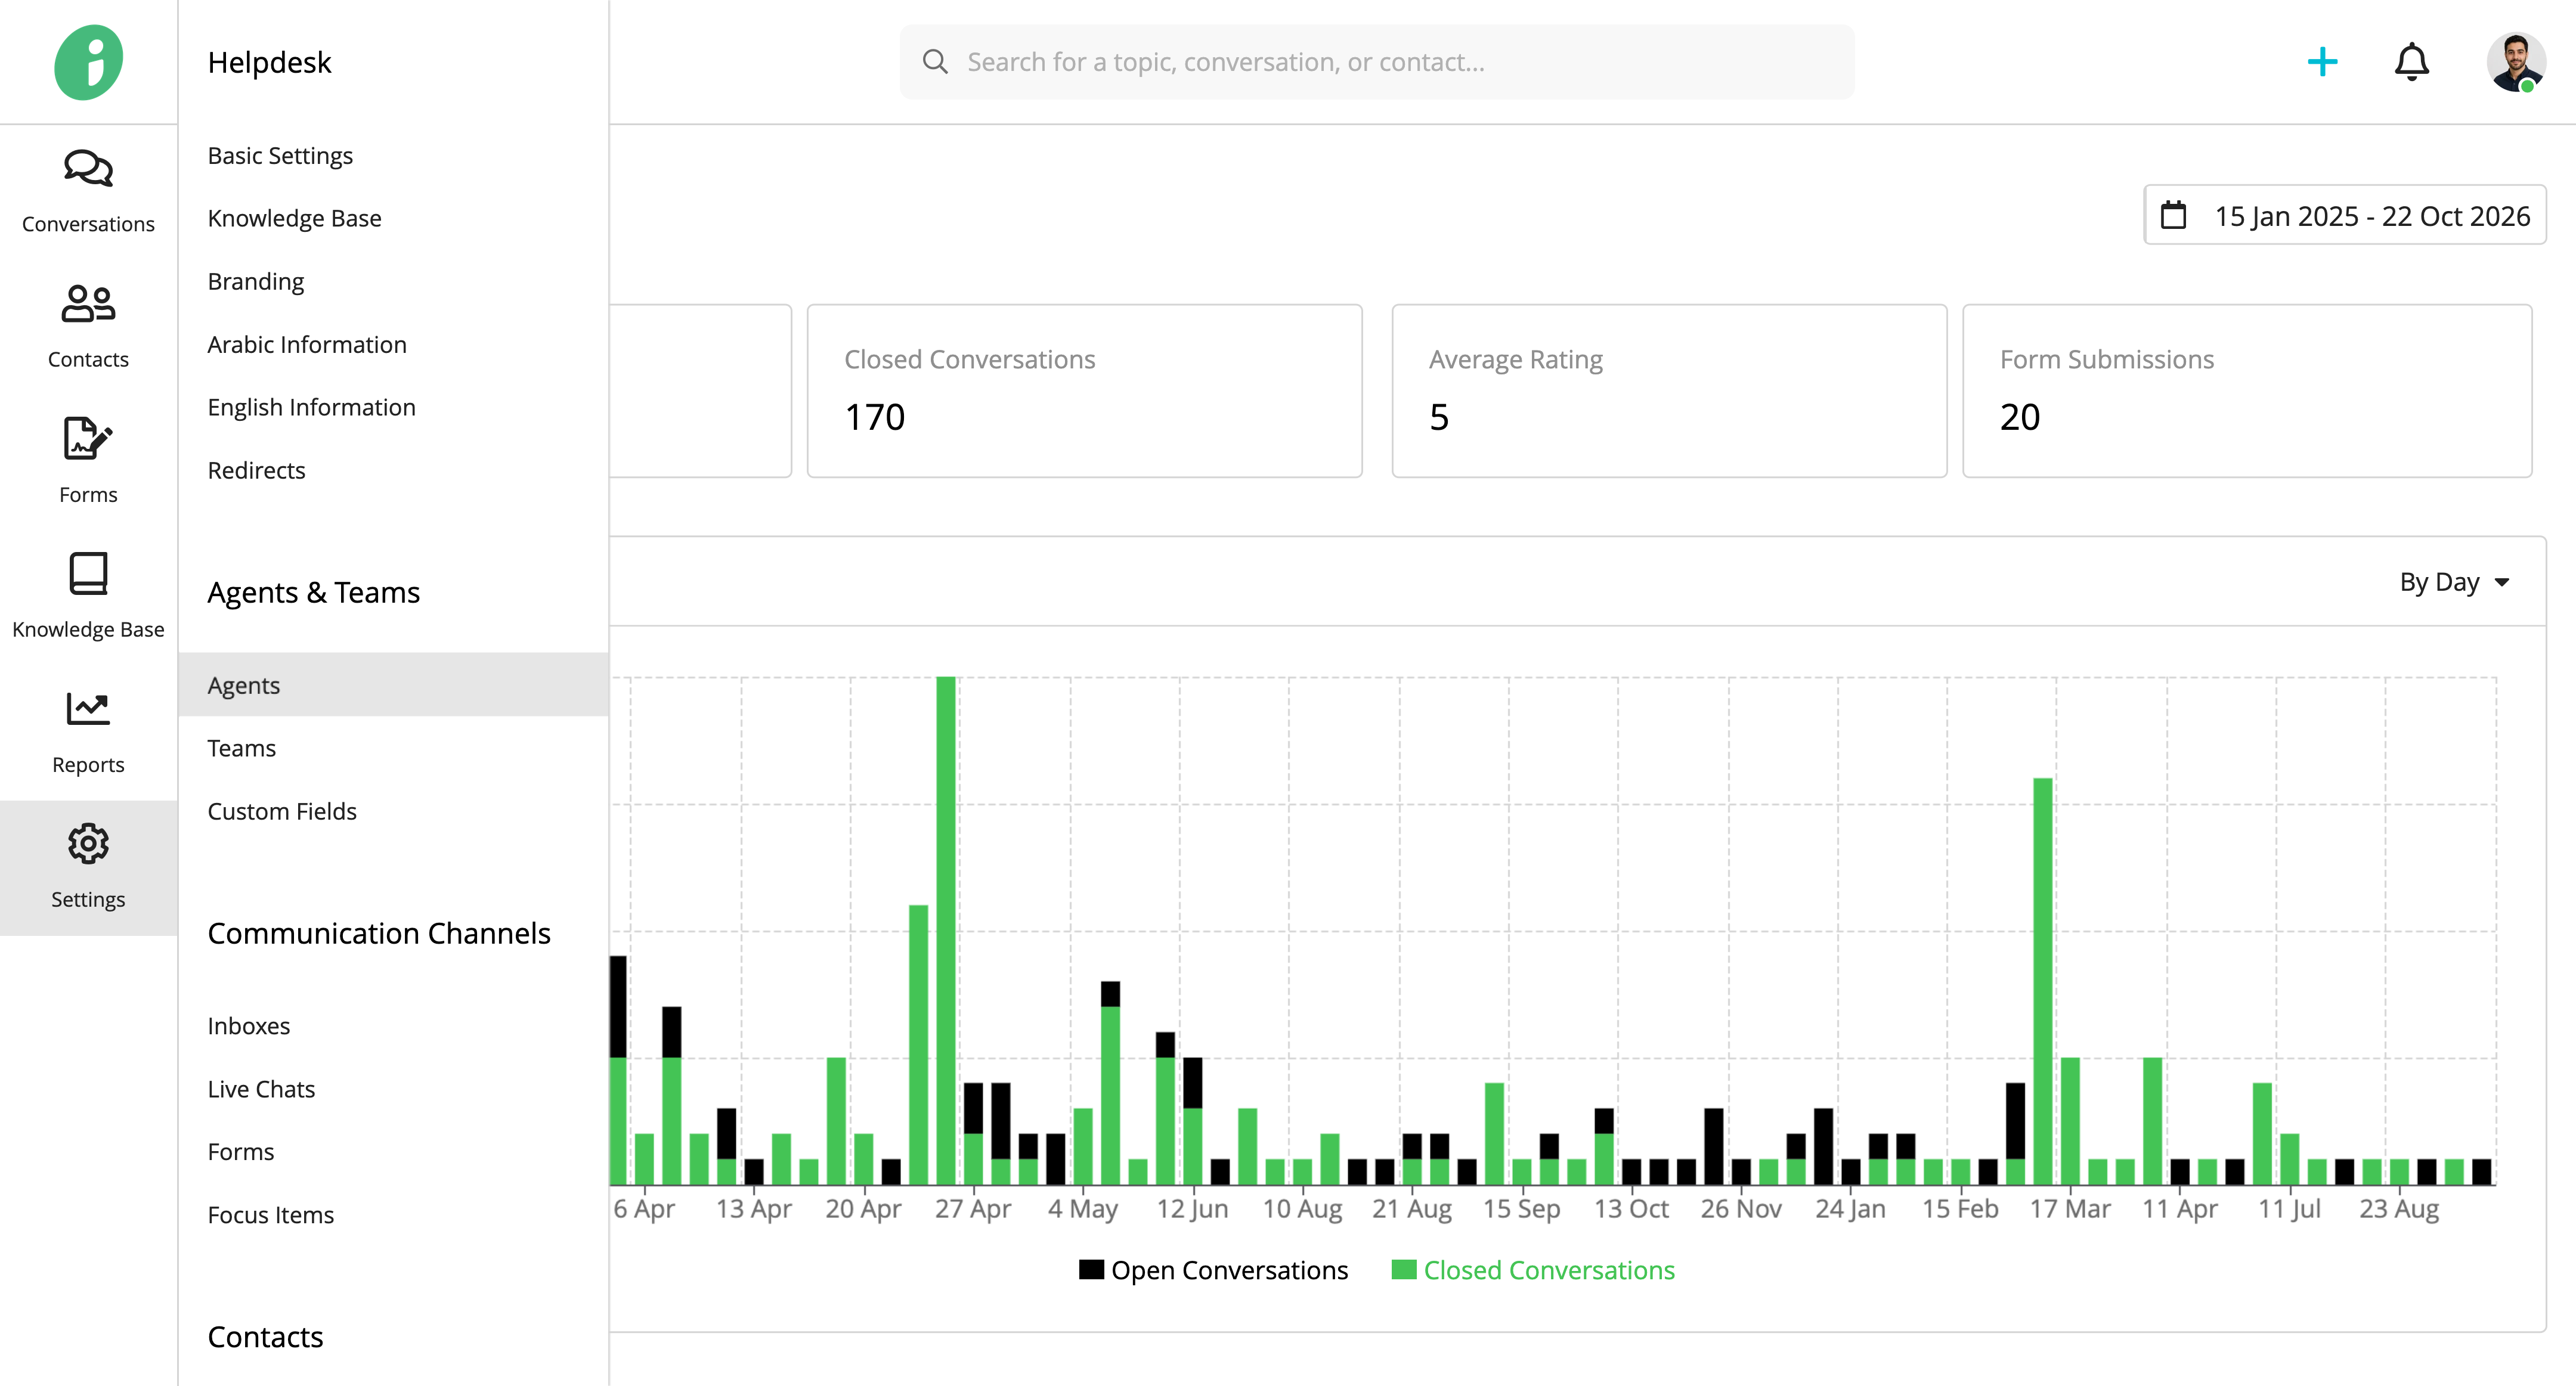
Find the agent you want to update, open their options menu, and select Edit.
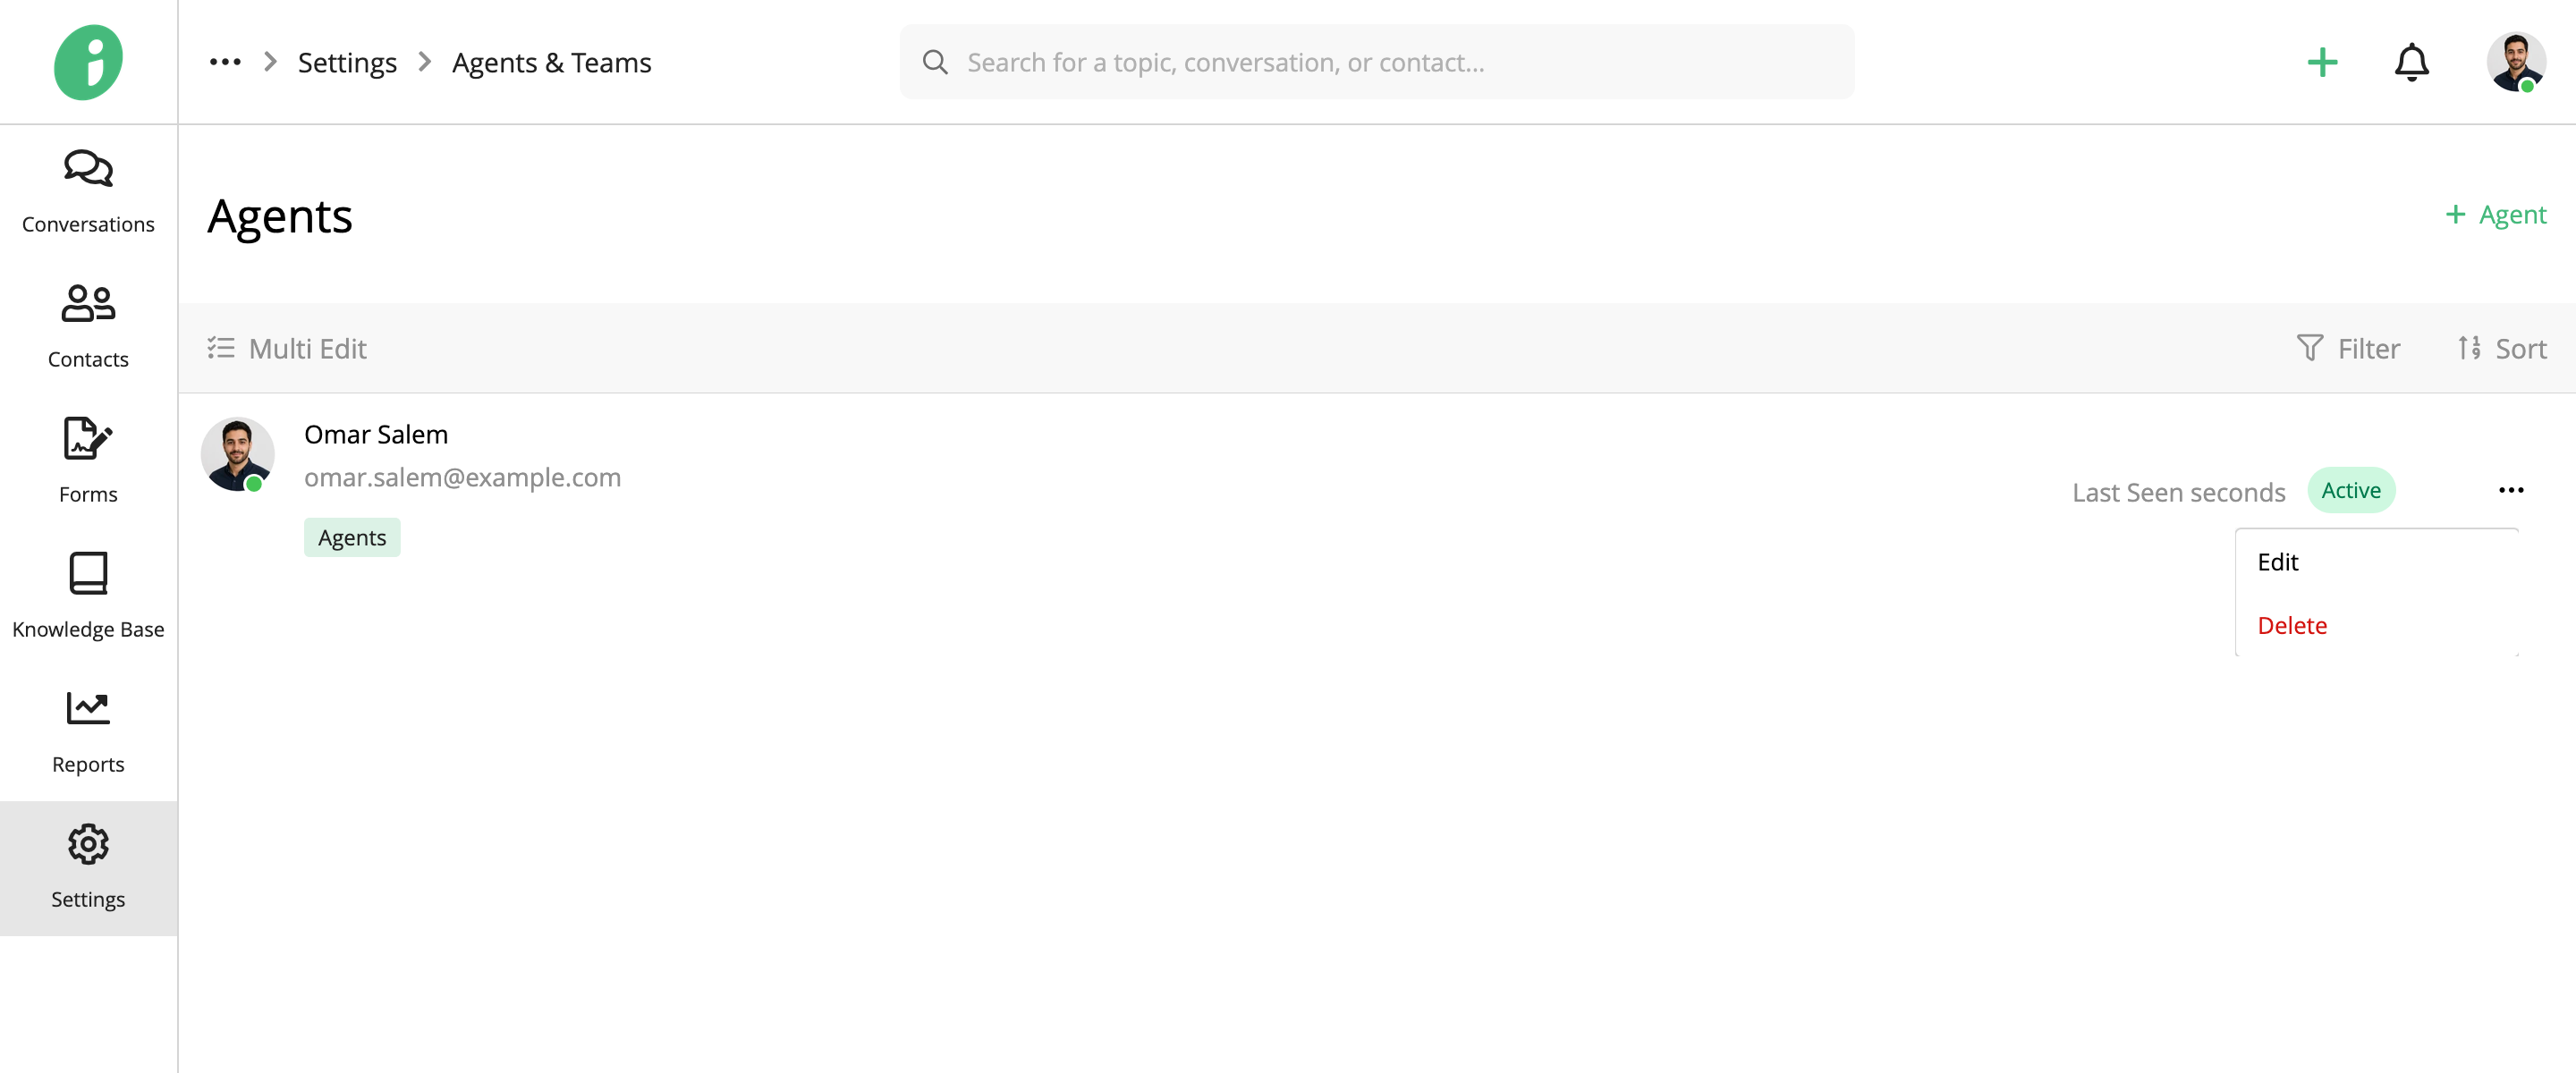
Basic Settings
Under Basic Settings, you can update the following:
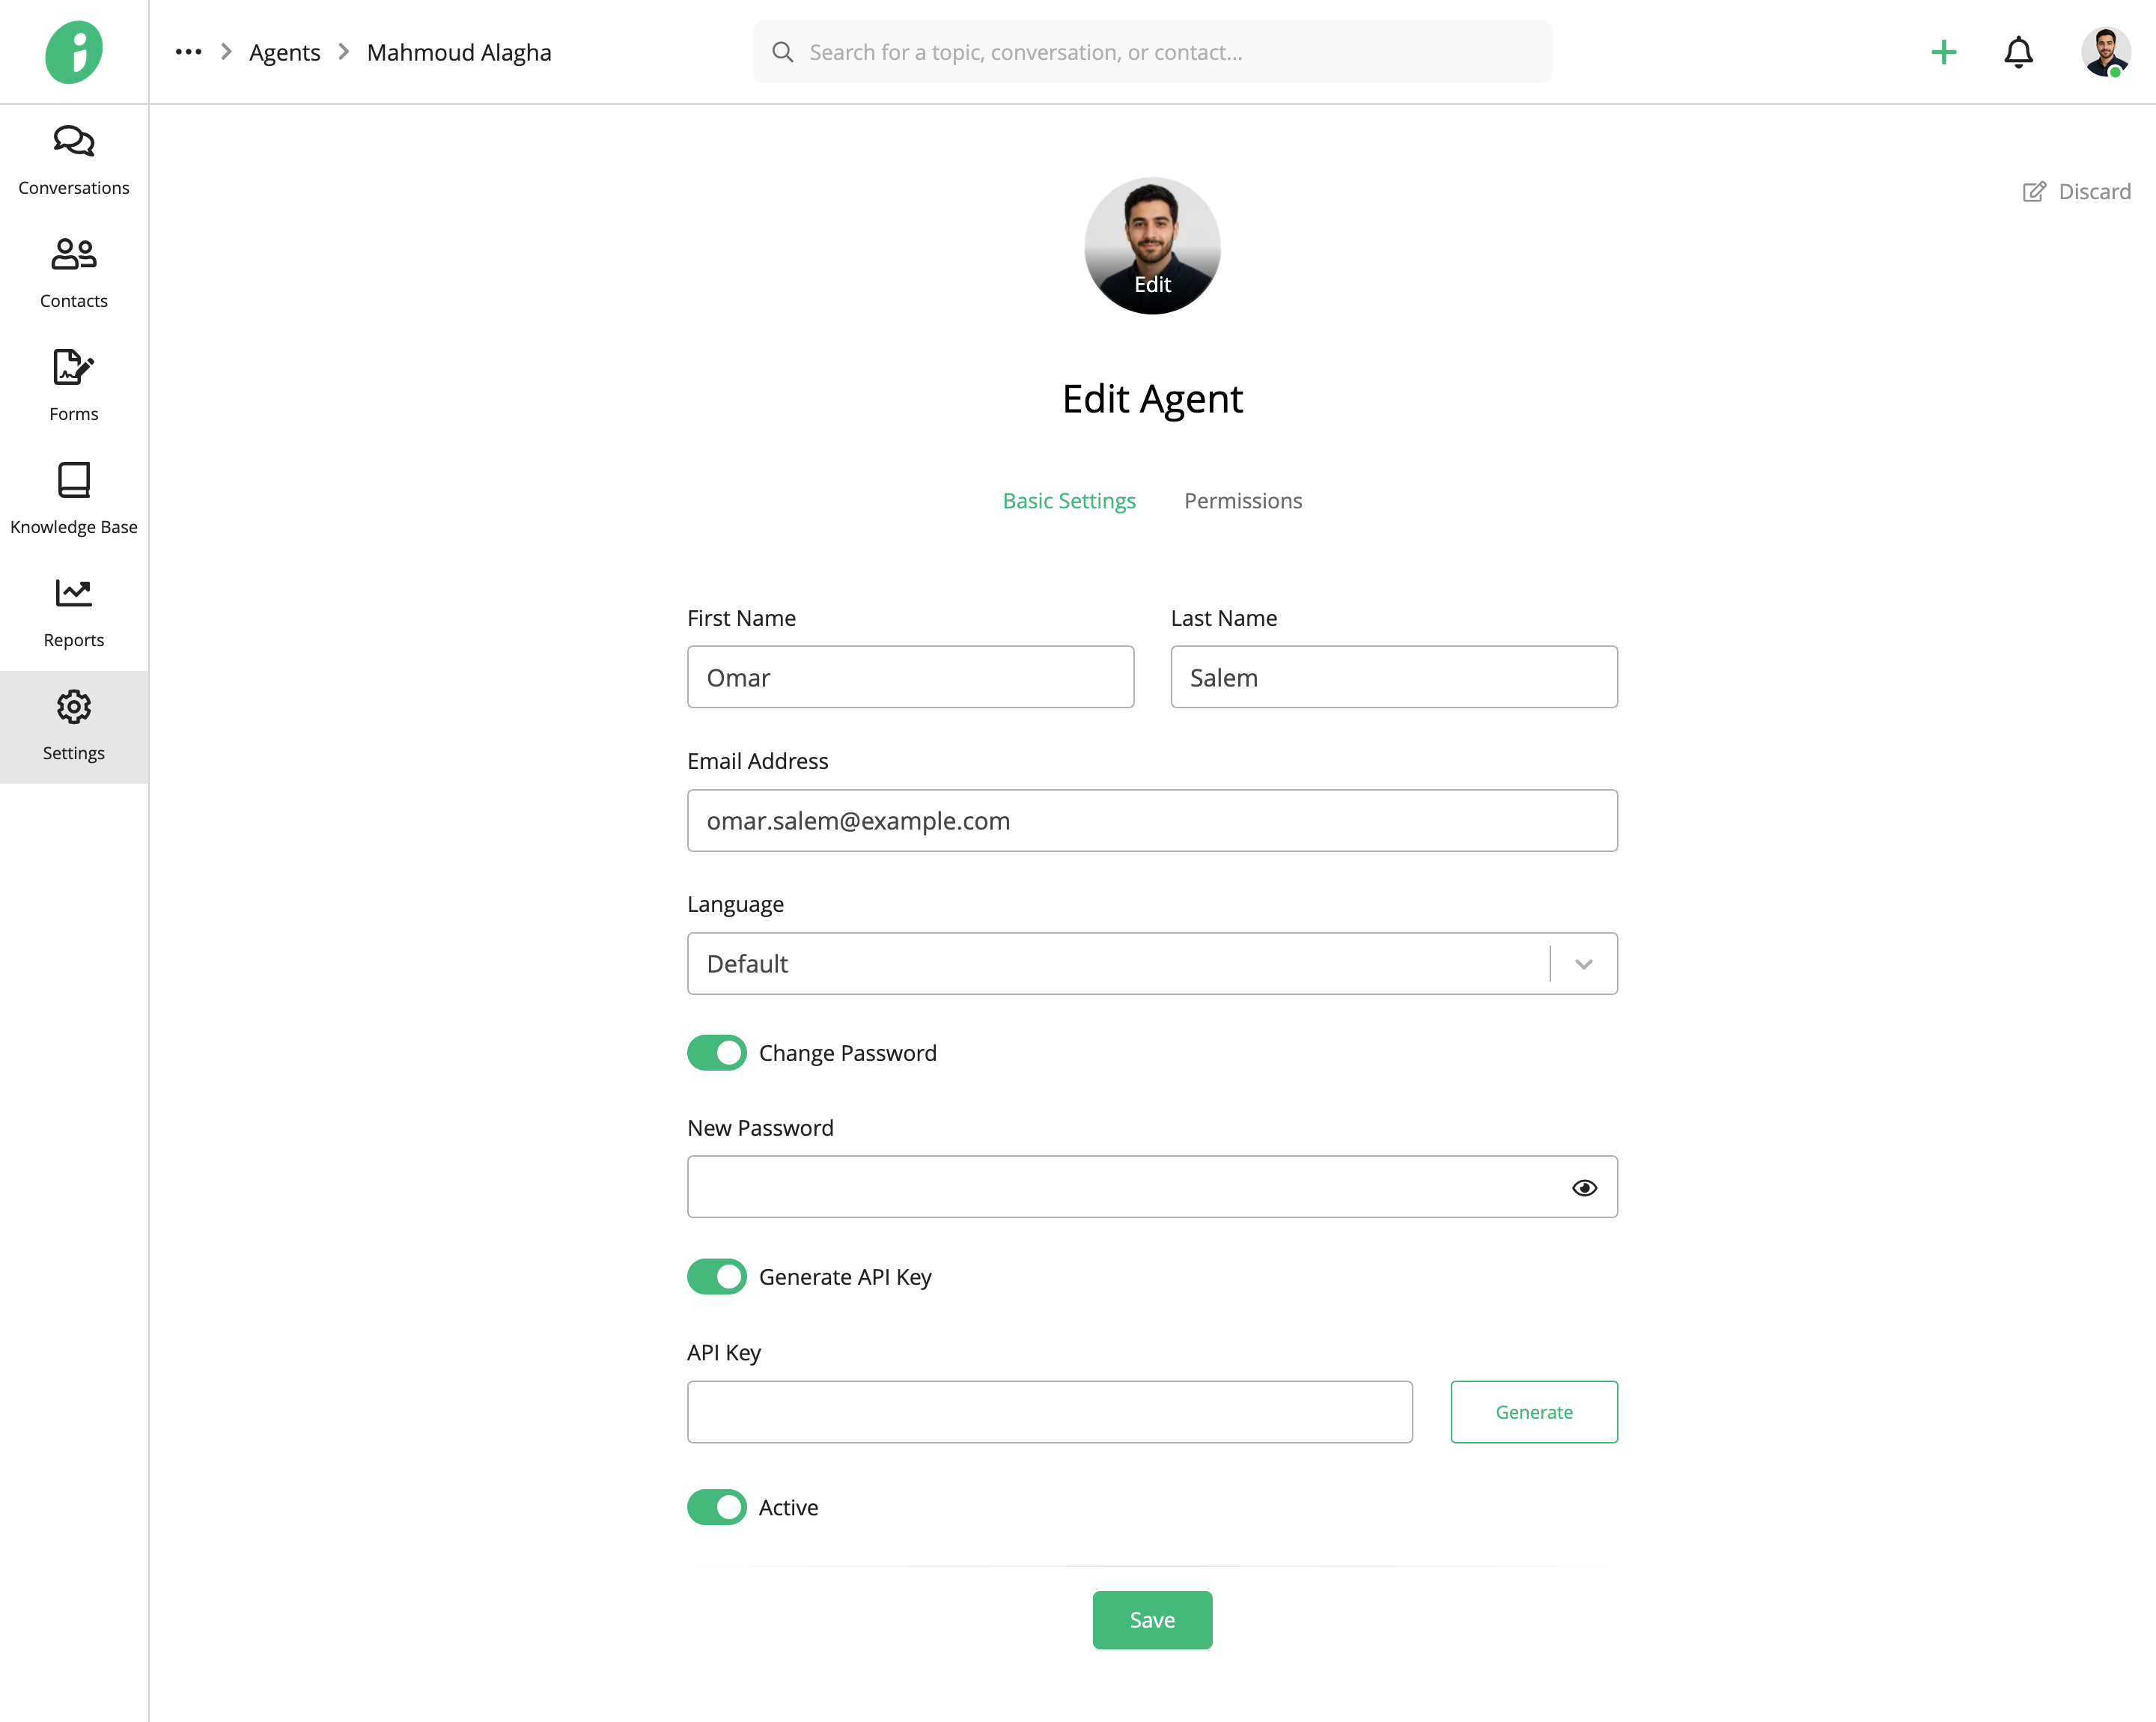
- First Name: Change the agent’s first name.
- Last Name: Change the agent’s last name.
- Email Address: Update the email address the agent uses to sign in.
- Language: Select the language displayed to the agent when they sign in.
- Change Password: Enable this option to enter a new password for the agent.
- Generate API Key: Enable this option and click Generate to create an API key for the agent.
- Active: Enable or disable the agent’s account without deleting it.
Click Save to apply your changes.
Permissions
Select Permissions to update the agent’s access:
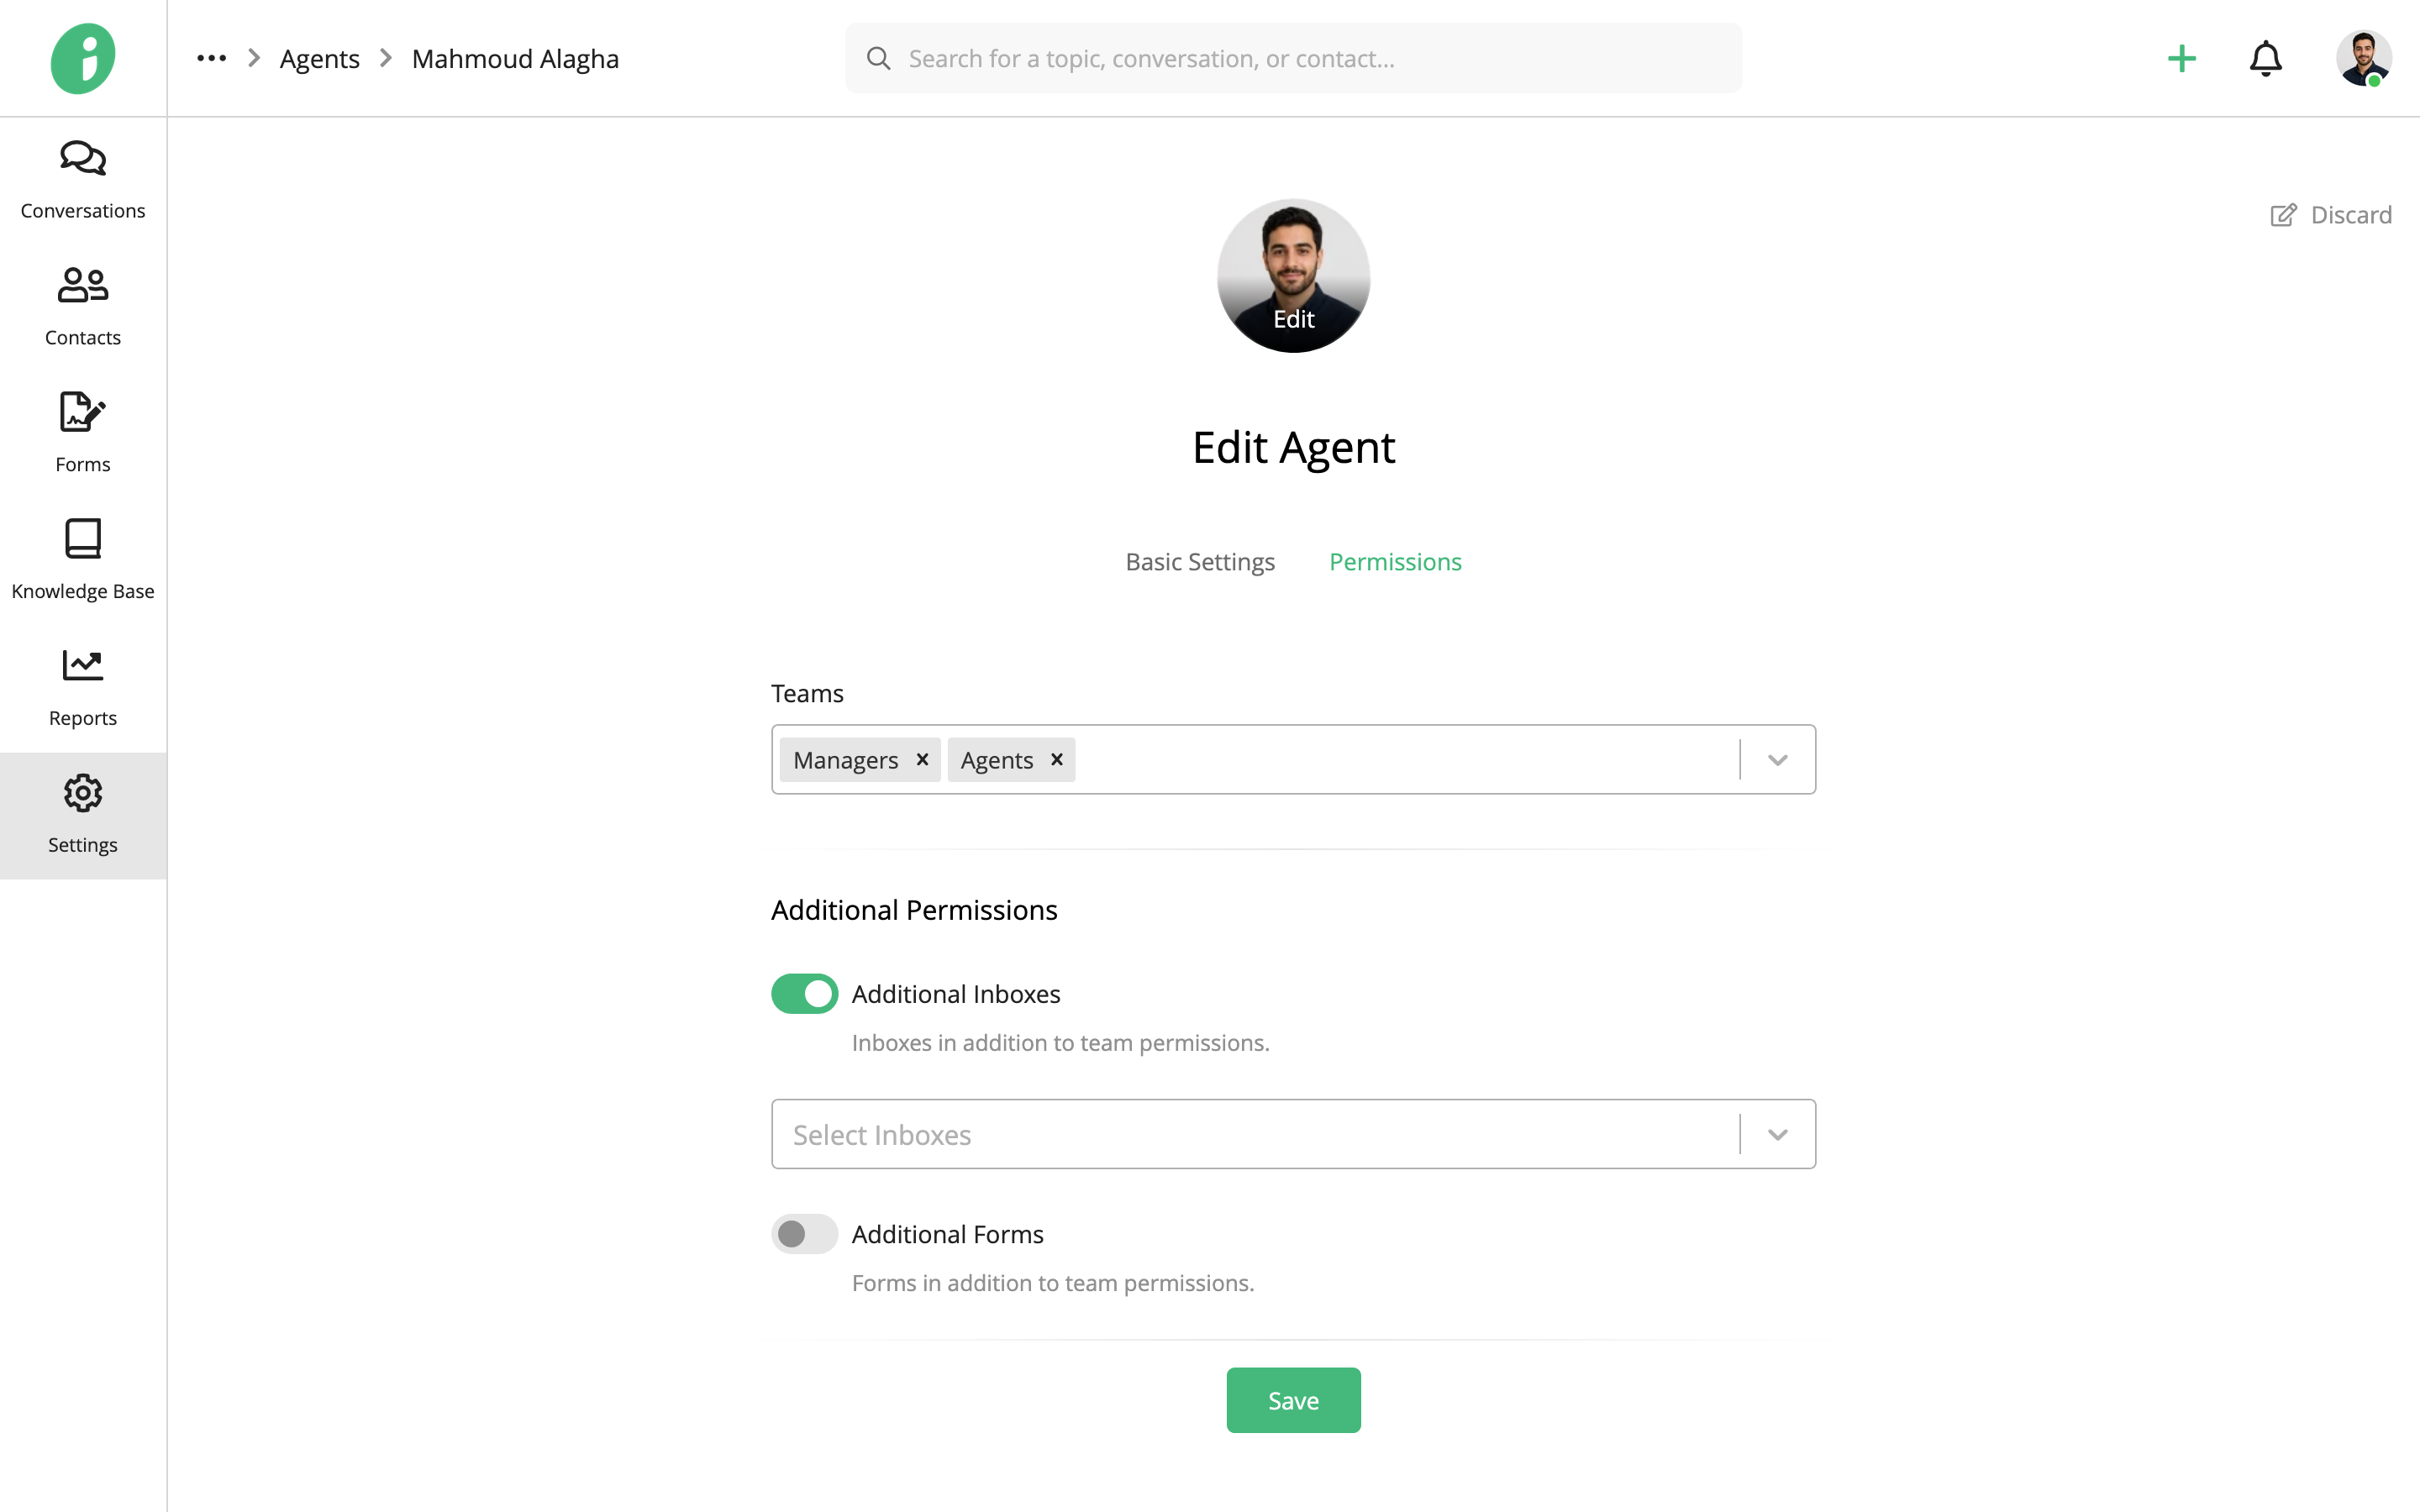
- Teams: Change the teams the agent belongs to.
- Additional Inboxes: Grant access to inboxes beyond those available through the agent’s teams.
- Additional Forms: Grant access to forms beyond those available through the agent’s teams.
Click Save to apply your changes.
Custom Fields
You can use Agent Custom Fields to store additional information about agents, such as availability, specializations, or other details relevant to your team.
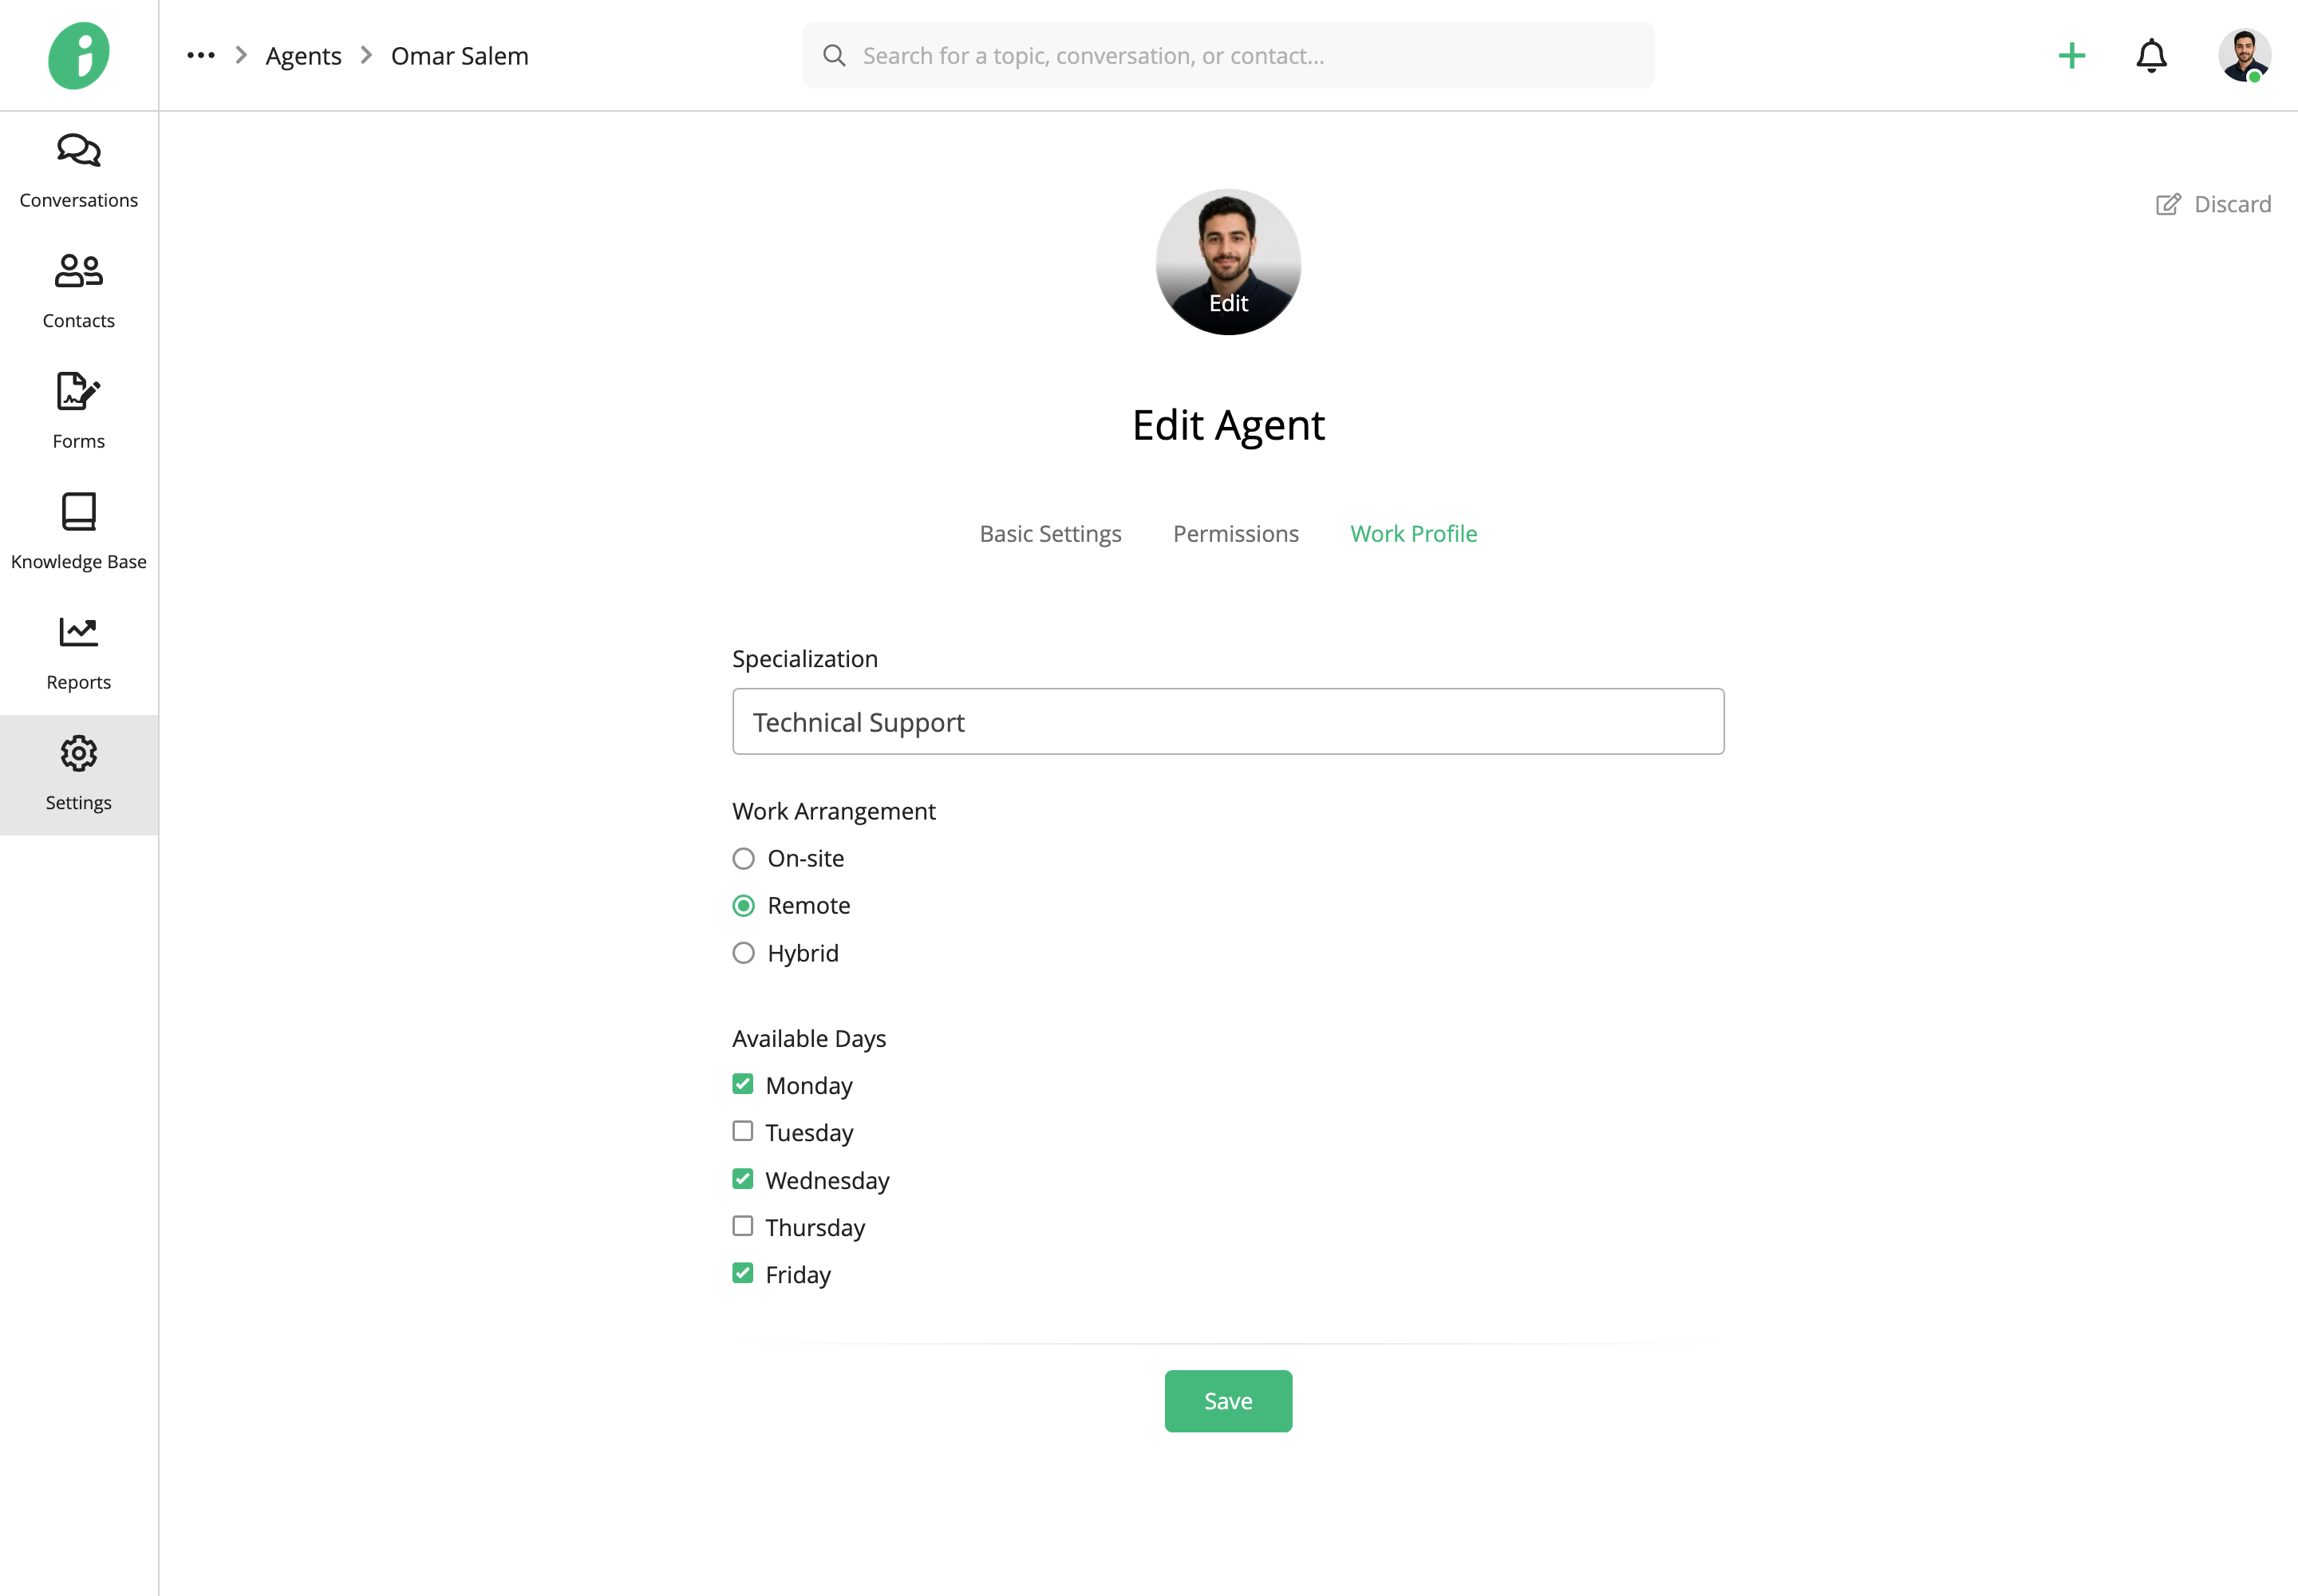
For more information, see Manage Agent Custom Fields.
Delete an Agent
You can temporarily disable an agent without deleting their account, making it easier to restore access later.
To disable an agent, go to Settings → Agents & Teams → Agents, open the agent’s options menu, and select Edit.
Under Basic Settings, turn off Active, then click Save.
To permanently delete an agent, return to the agents list, open the agent’s options menu, and select Delete.
Related Articles
- Manage Teams
- Reset an Agent’s Password
- Manage Agent Custom Fields